


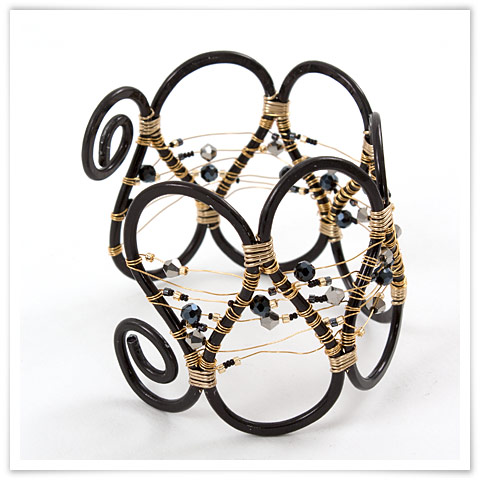
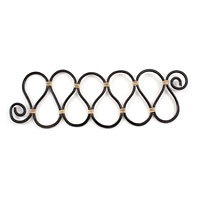
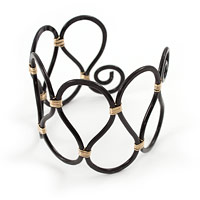
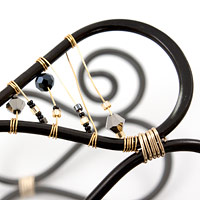
Project - Farpado
Cuff bracelet made of various beads strung on a cooper string twisted on a hammered aluminum string base.
Material
- 86.5 cm of Beaders’ Choice 2.5 mm black aluminum string
- +/- 3.5 m of Beaders’ Choice copper string, gage 28, yellow
- 1 m of half-round brass string, gage 22, brass
- 12 bicone Stellaris crystal beads 4 mm, silver
- 11 round Stellaris crystal beads 4 mm, hematite
- 18 Stellaris crystal beads 11/0, metallic black
- 37 Delica loose pearls Delica 11/0, gold with a silver center
- 57 Czech loose pearls 15/0, opaque black
Tools
- Anvil
- Mandrel that measures 2.5 cm in diameter
- Hammer
- Precision sharp pliers
- Flat nose pliers
- Nylon covered flat nose pliers
- Round nose pliers
- Tool Magic protective coating
Creation of the aluminum string base
Step 1
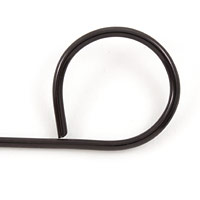
Measure and cut 86.5 cm of Beaders’ Choice aluminum strings. With the mandrel, curve the end of an aluminum string to make a fantasy loop.
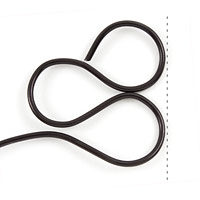
Step 2

Position the mandrel under the loop to make a reversed loop. Bring back the string so it wraps around the mandrel and sides next to the loop so as to create an “S” shape, as illustrated.
Step 3
To make a new loop, repeat step 2. Make sure to position the mandrel in such a way, as for the outside curve to equals that of the first loop.
Step 4
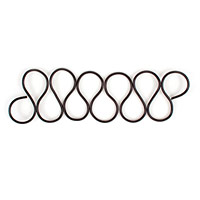
Repeat step 2 and 3 until you obtain 10 loops with a fantasy loop at each of their ends.
Step 5
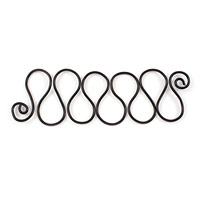
Bring the tip of the aluminum string towards the inside of each loop that is found at the extremities in such a way as to form a spring.
Step 6

Lightly hammer the whole surface of the aluminum base, except for the middle part. For a more fluid and efficient movement, hold the hammer by the handles extremity. To avoid damaging the metal, place the face of the hammer parallel to the anvil’s flat surface.
Tying the loops
Step 7
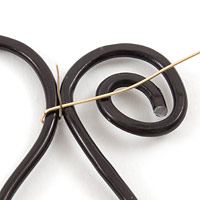
Measure and cut approximately 10 cm of half round brass strings. To ink the loops’ junctions, position the string on the aluminum base and wrap it once as illustrated bellow by taking the 1.5 cm excess. Carefully place the flat side of the brass string facing against the aluminum string.
Step 8
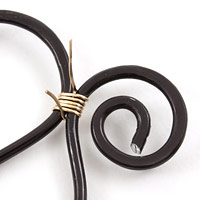
Wrap 5 times tightly the brass string around the two aluminum strings. If needed, use flat sharp pliers to ensure the brass string is tightly fixed at each turn. Position the strings in the wholes as illustrated bellow. Cut any excess.
Step 9
Repeat step 7 and 8 to tie each loops junctions.
Decorating the aluminum base
Step 10
Using you hands, mold the aluminum base into a rounded shape. If needed mold it around your wrist. Since it is a cuff bracelet, keep an opening as illustrated bellow.
Step 11
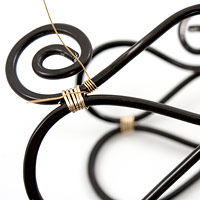
Measure and cut 35 cm of Beaders’ Choice copper strings. To start decorating the first loop, wrap it 4 times around the aluminum string near the first junction as illustrated bellow.
Step 12
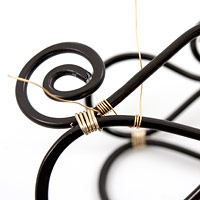
String the cord obliquely on the arm opposite to the loop, by passing the string from under. Make 2 to 3 rows to allow for the string to pop out on top. Bring the string once more to the other side by passing it under. On this arm, wrap the string 2 or 3 times. Leave a space of about 1 cm between each section of string wrapped on a same arm.
Step 13
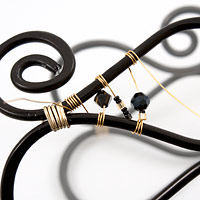
Repeat this step by stringing Stellaris crystal beads and loose pearls randomly, while alternating from one arm to another. From time to time, avoid stringing beads on the string for a more spacious look.
Step 14
To fasten it, wrap the string at the same level as the opposite junction, as illustrated bellow. Cut any excess.
Step 15
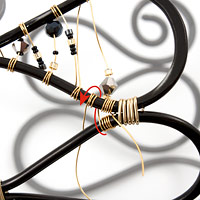
To decorate the following loop, measure and cut another section of 35 cm of cooper string. Wrap it around the following arm, then between the two first sections of wrapped string of the previous loop, as shown on the following image.
Step 16

Just as for the previous loop, alternate one side to the other by inserting the beads onto the copper string. Fasten the string on the arm near the following junction, then cut any excess.
Step 17
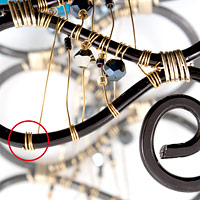
Repeat step 15 and 16 to decorate all the other loops. For the last loop, finish the wrapping on the external arm, as shown on the following image. Cut any excess string.
Inspiration & Variation