


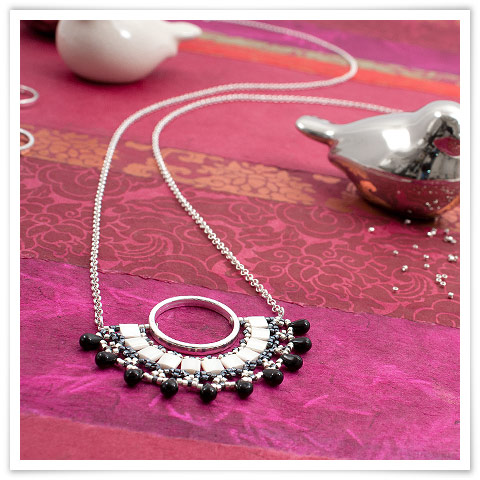
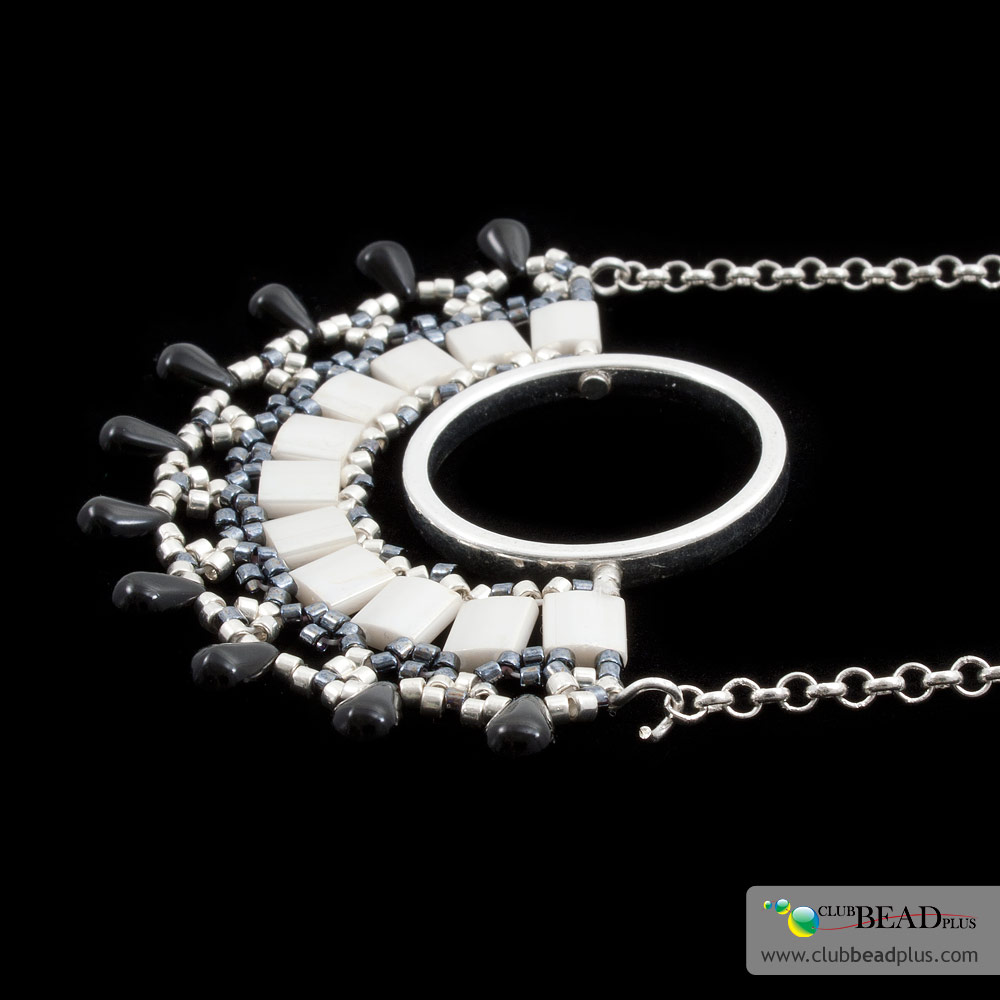
Project - Éventail
Long necklace made with an element that is weaved and shaped as a fan, which hangs from a chain.
Material
- +/-1 m of weaving nylon thread K.O. 0.008", ivory
- 10 drop shaped glass beads 4x6mm, jet
- 11 Tila beads 5mm with two holes, pearled ivory
- 86 Delica seed beads 11/0, black metallic
- 97 Delica seed beads 11/0, black galvanized silver
- 1 metal ring 25 mm with 2 holes, silver
- 1 m of metal rolo chain 2,5 mm, silver
- 1 claw clasp 10 mm, silver
- 2 jump rings of 4 mm, silver
- 2 flat head pins 25 mm, silver
Tools
- Flexible needle to weave
- Scissors
- Liquid transparent glue
- 2 flat nosed pliers
- Flush cutter pliers
- Round nosed pliers
Preparation
Step 1
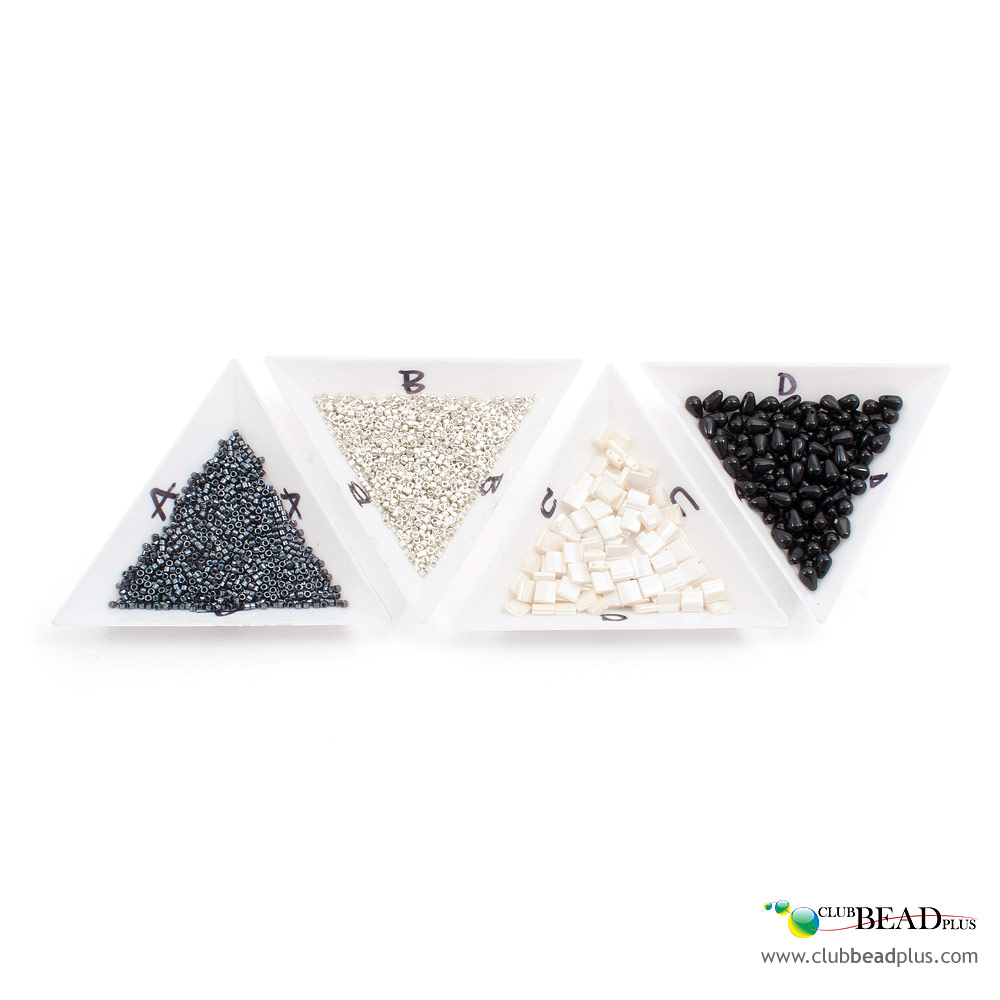
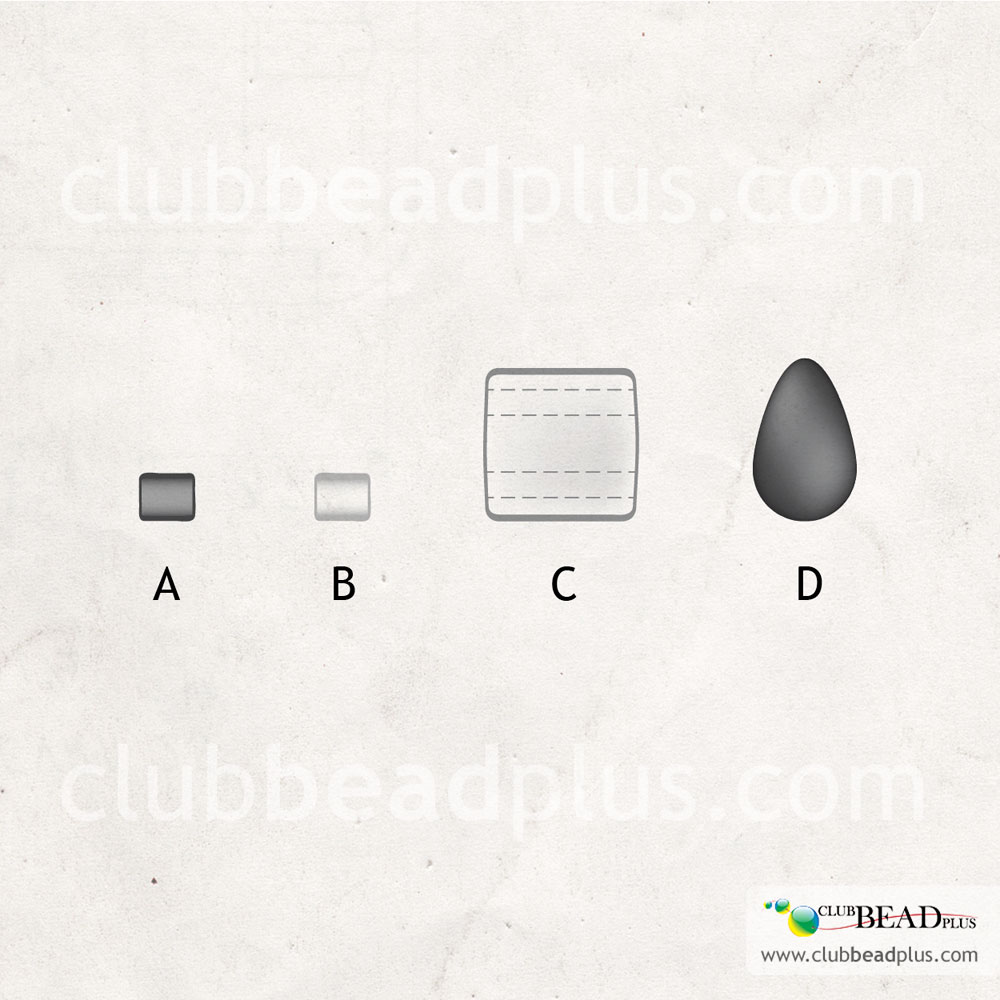
Identify the various seed beads A, B, C and D to better understand the different weaving steps: A and B for the Delica seed beads of two different colors, C for the Tila and D beads shaped as drops.
Step 2
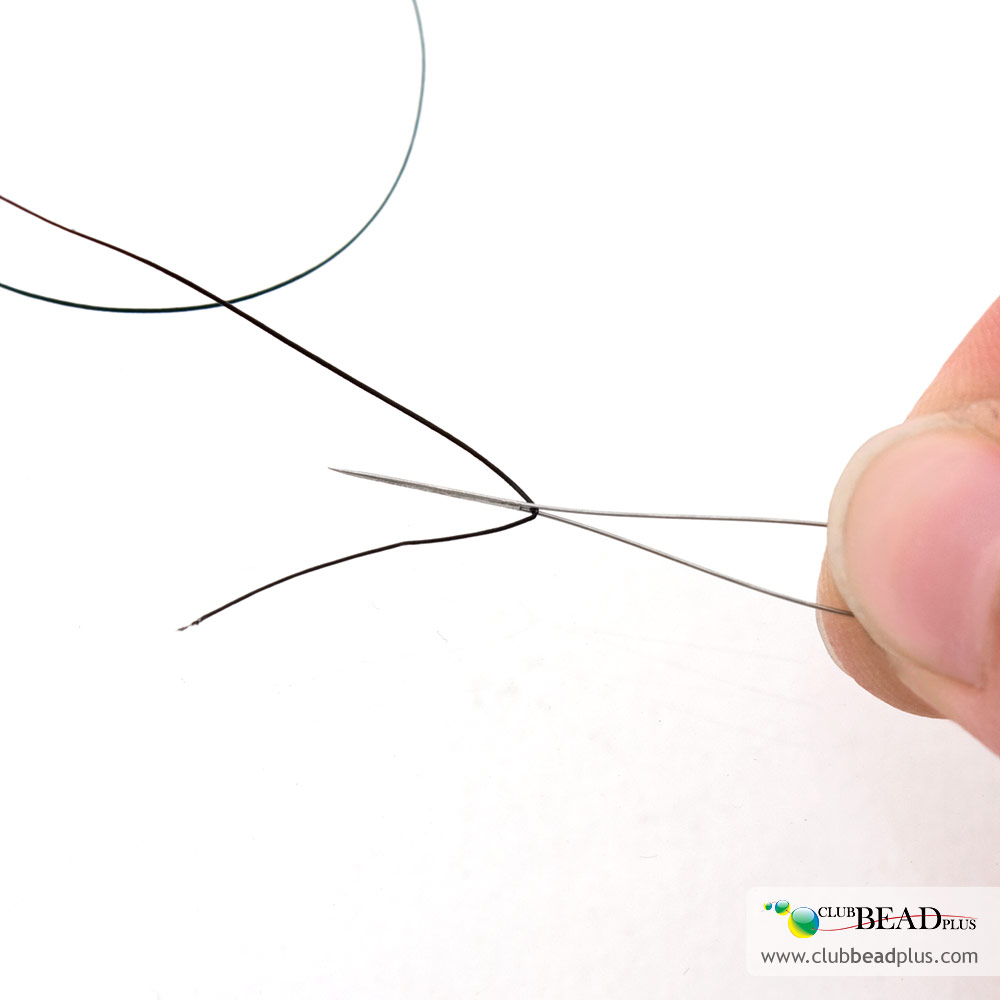
Measure and cut approximately 1 cm, of weaving string. Put a needle on an extremity.
Tip :If the string that you are using seems a little elastic (nylon), stretch it, by pulling on both extremities before starting the weaving. This will prevent the string from stretching during the weaving.
Step 3
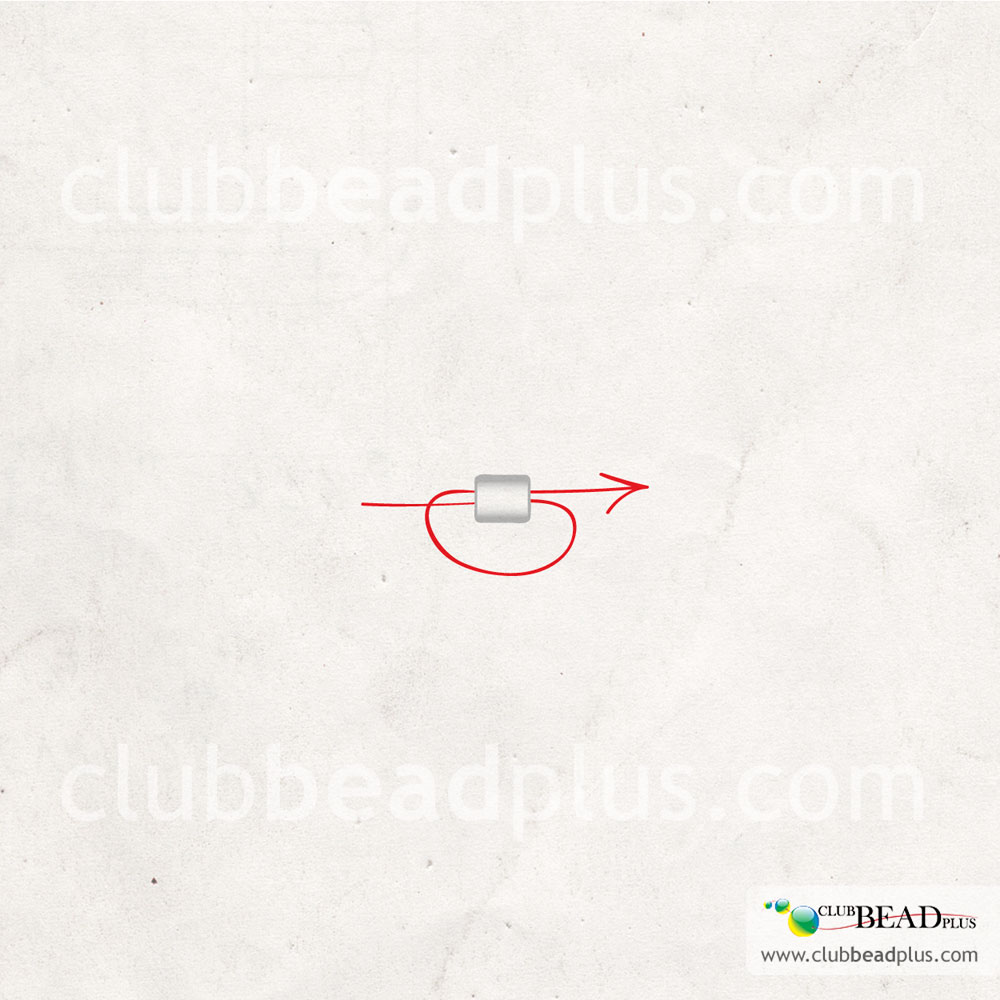
String a seed bead A or B and position it at 10 cm of the other extremity of the string. Then, restring through the bead to block the string. This bead is used only to prevent the weaving from moving on the string, it will be removed at the end.
Making the weaved pendant
Step 4
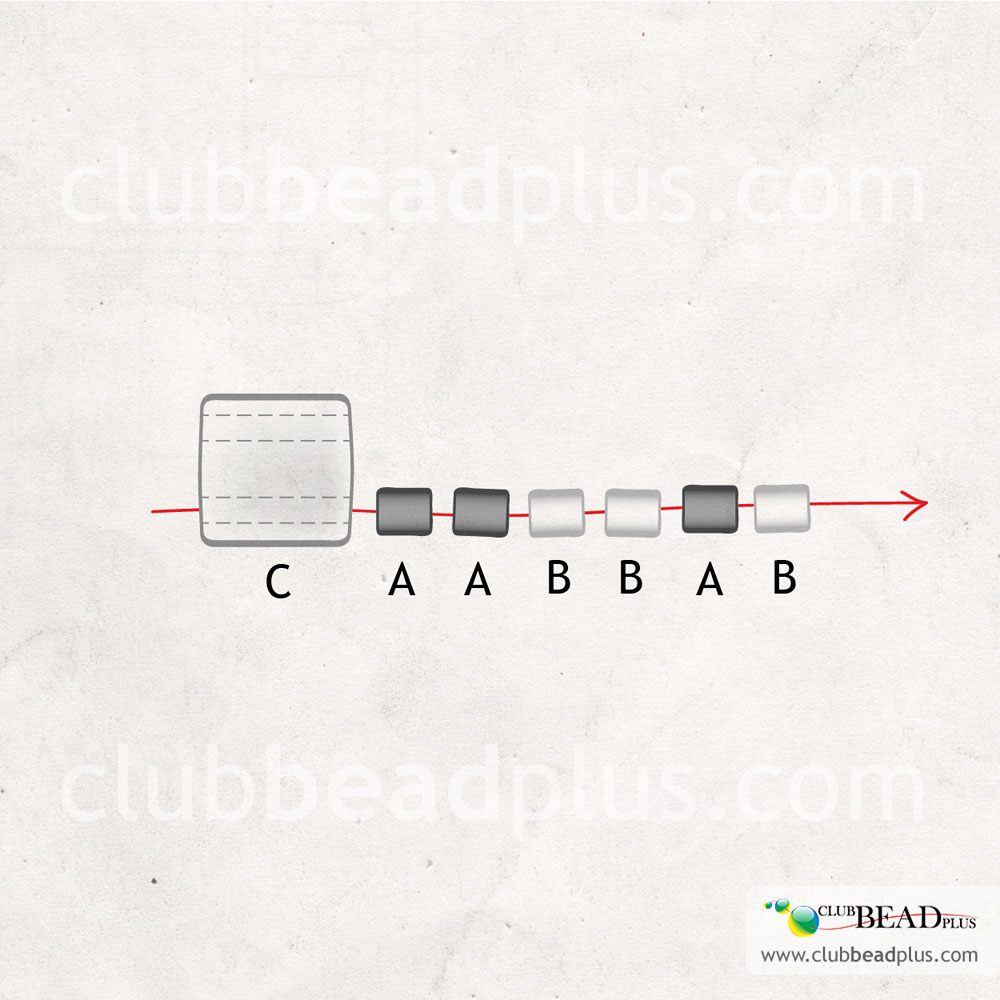
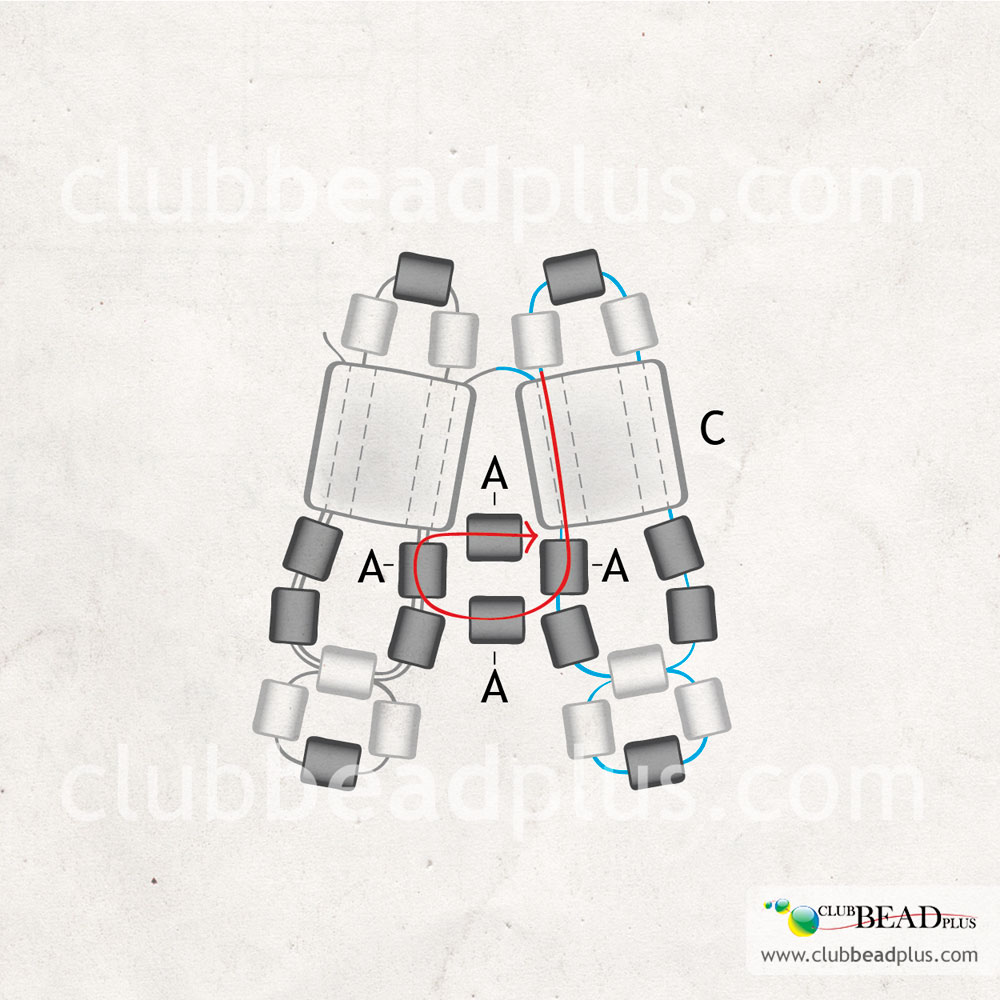
String the beads in the following order C-A-A-B-B-A-B.
Step 5

String bead B (the first) to form a loop, as illustrated in “A”. The result obtained is shown in “B”.
Step 6

Add two A beads then string them in the other hole of the previously strung C bead.
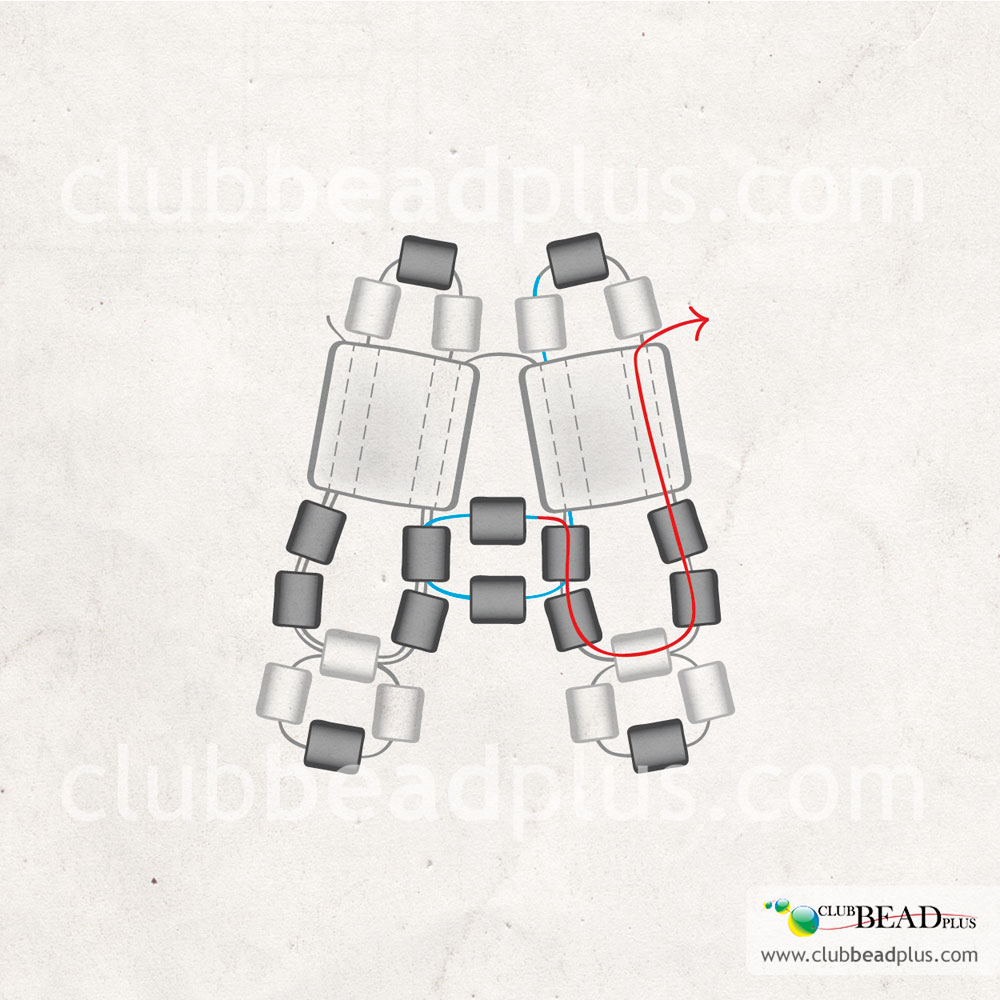
Step 7
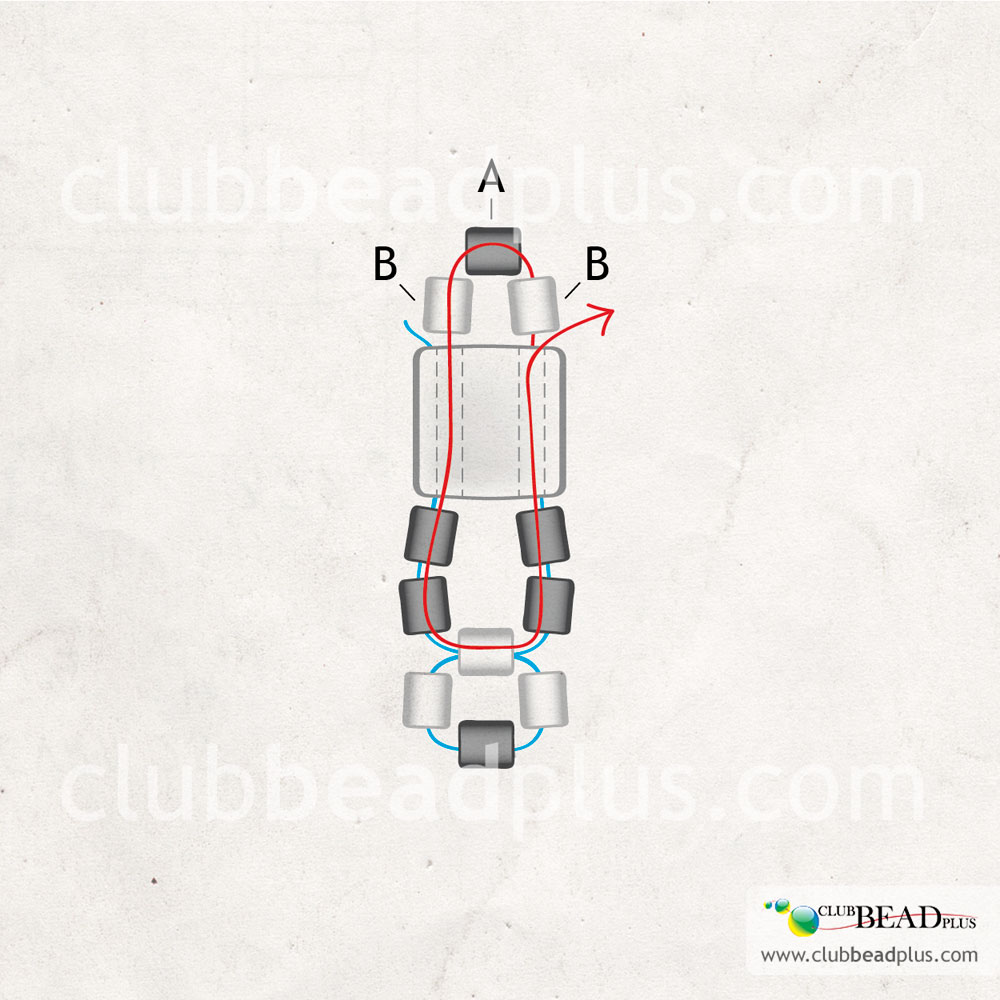
String beads B-A-B and string them again in the «V», as illustrated, to strengthen the weaving and bring your string to the other side. Here is a first section.
Step 8
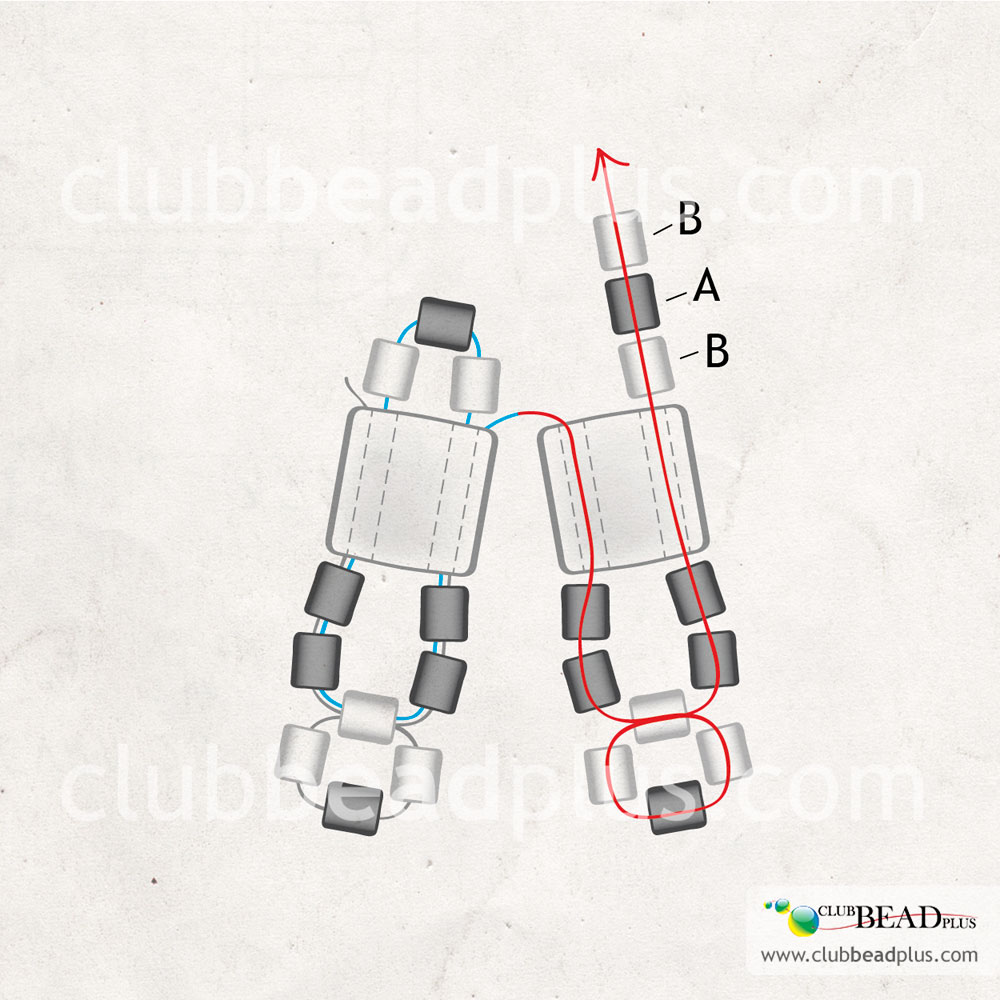
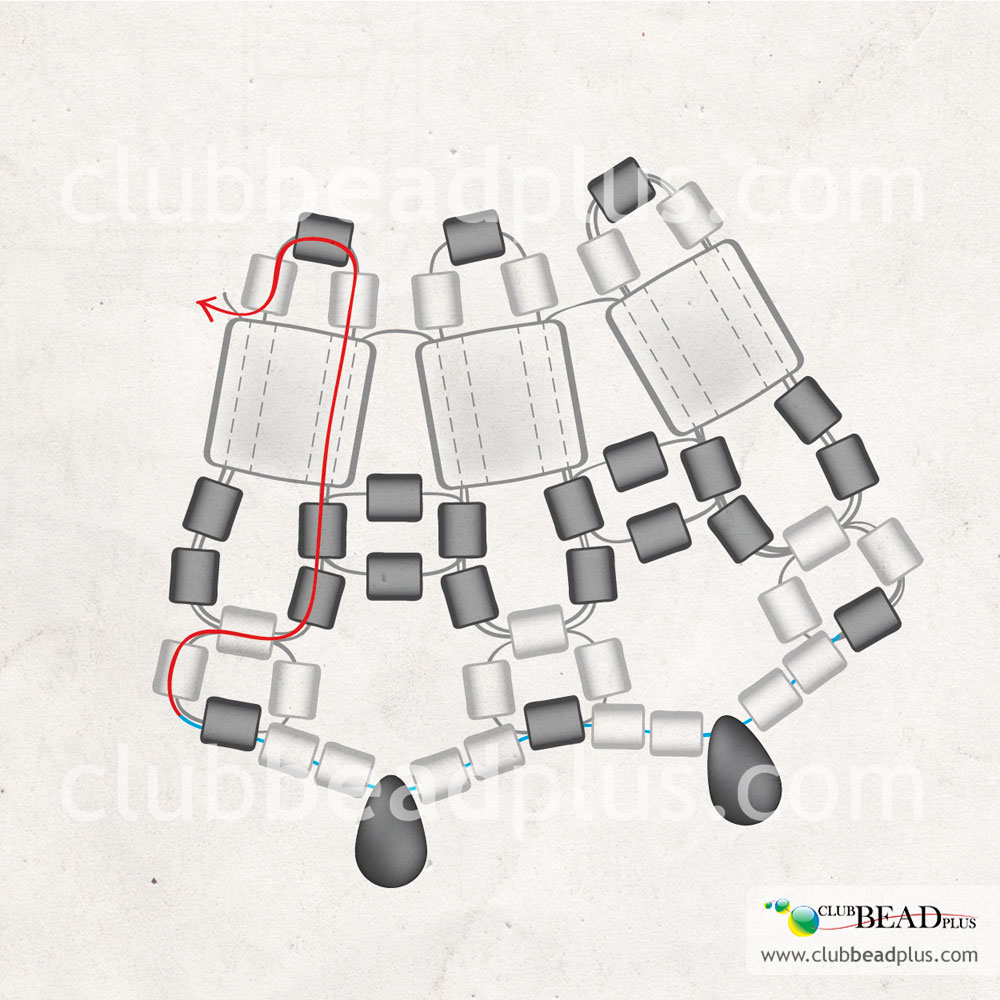
Repeat step 4 to 6 to start another weaving section and then string the beads B-A-B.
Step 9
Restring the C and A beads as illustrated. Add an A bead then, restring bead A in the previous section and add another A bead.
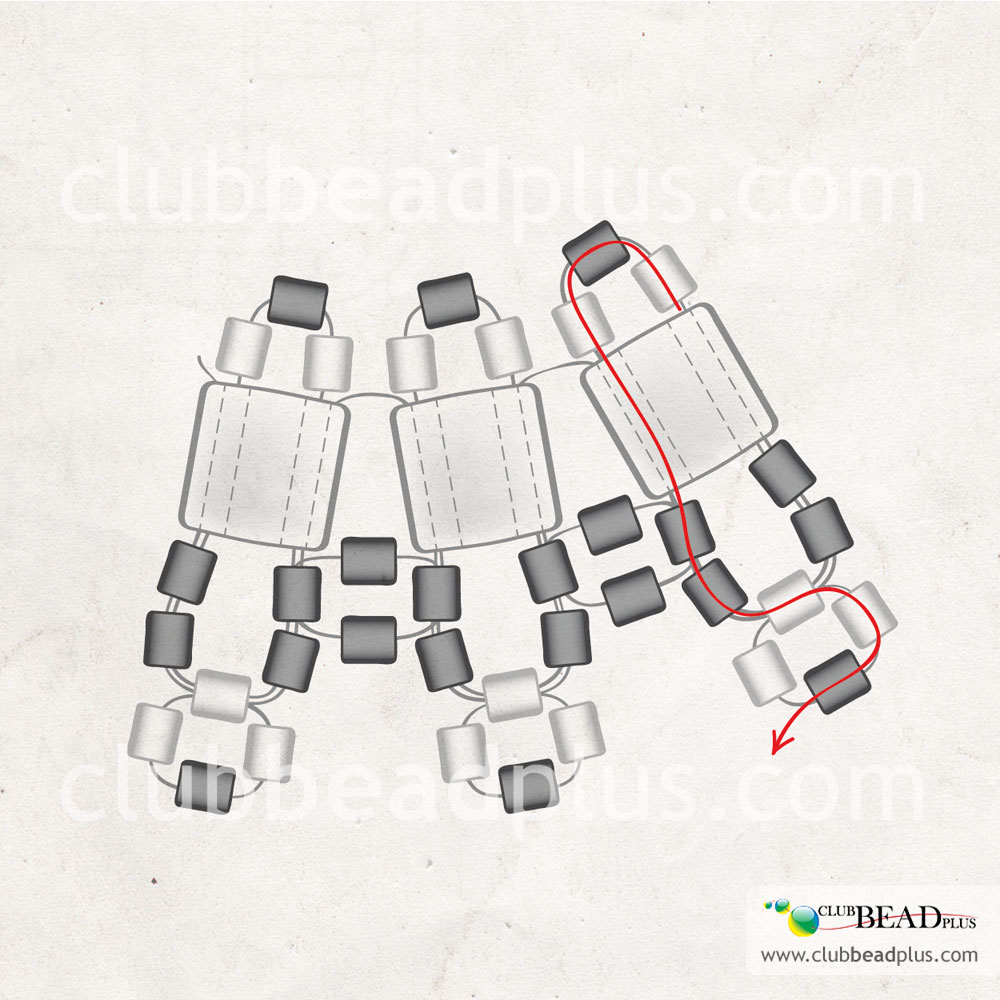
Step 10
Thread the string as illustrated to make it exit through the other side of the weaving.
Step 11
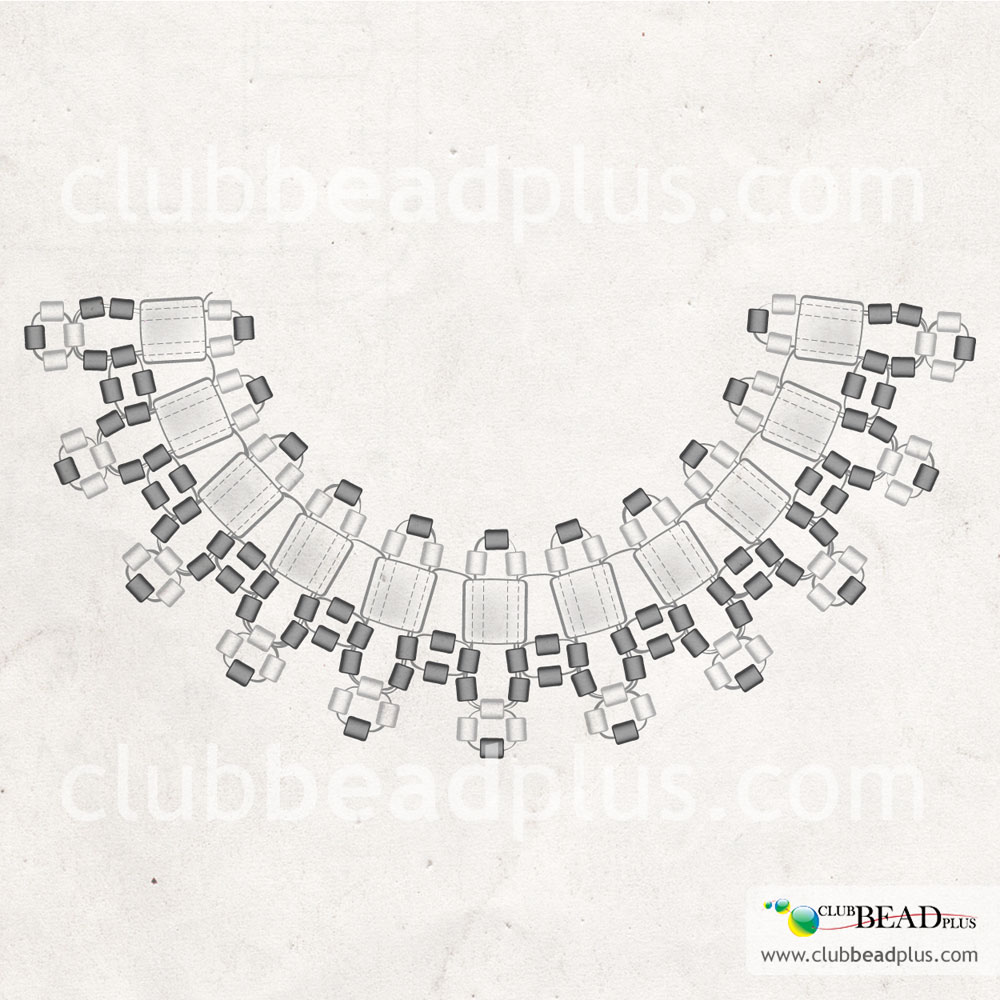
Repeat steps 8 to 10 to make 9 other sections for a total of 11 sections.
Making the inside embroidery of the weaving
Step 12
Thread the string as illustrated to position it at the bottom of the weaving.
Step 13
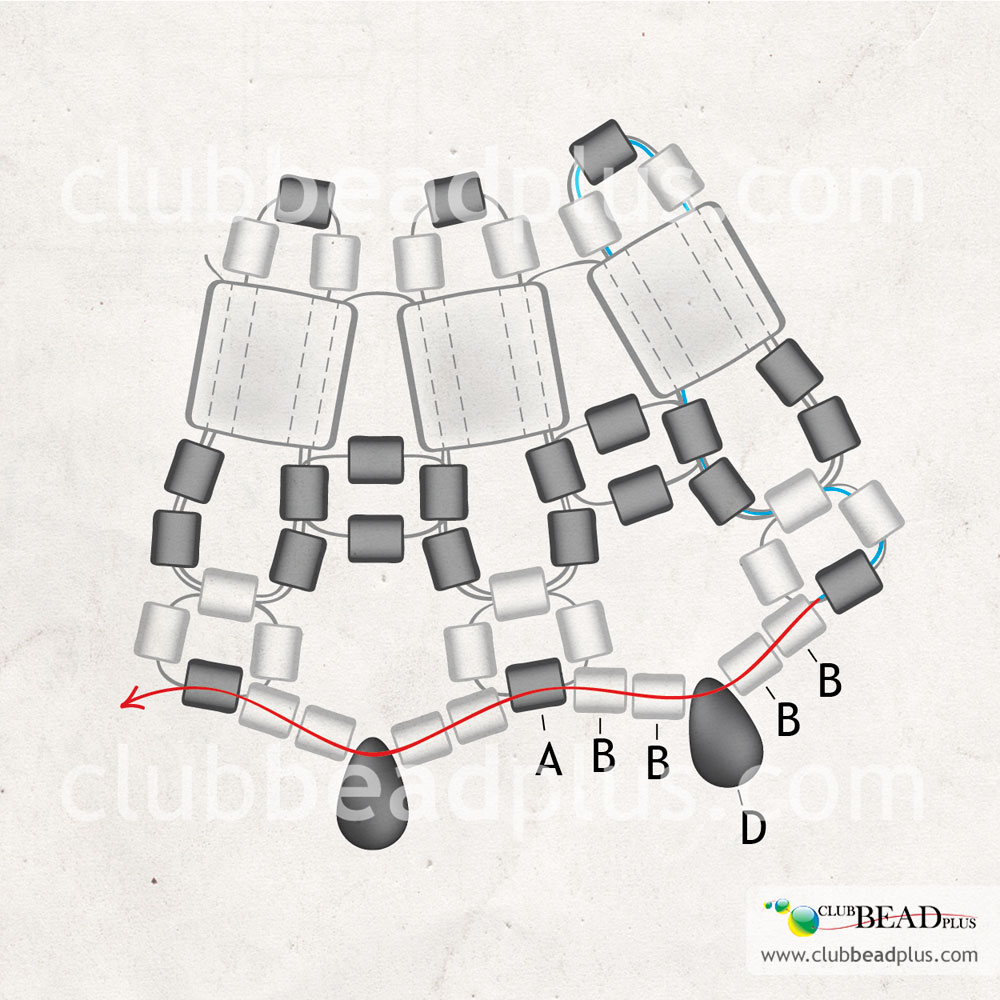
String beads B-B-D-B-B. Then pass the string in the A bead already positioned and continue in the same manner until you reach the other extremity of the weaving.
Step 14
Bring your string to meet at its other end, as illustrated, and remove the strung bead to “block” the other end of the string. It is at this point that the two other extremities are tied, after being assembled.
Assembly
Step 15
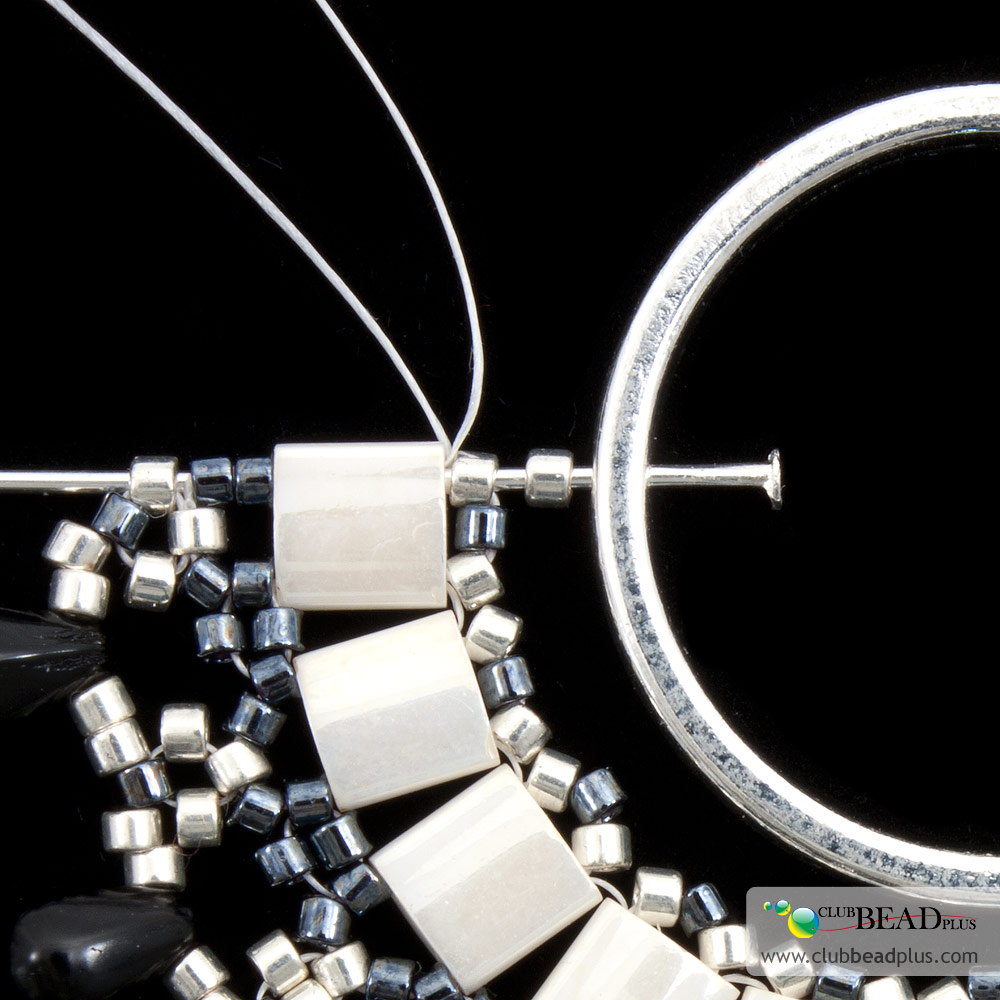
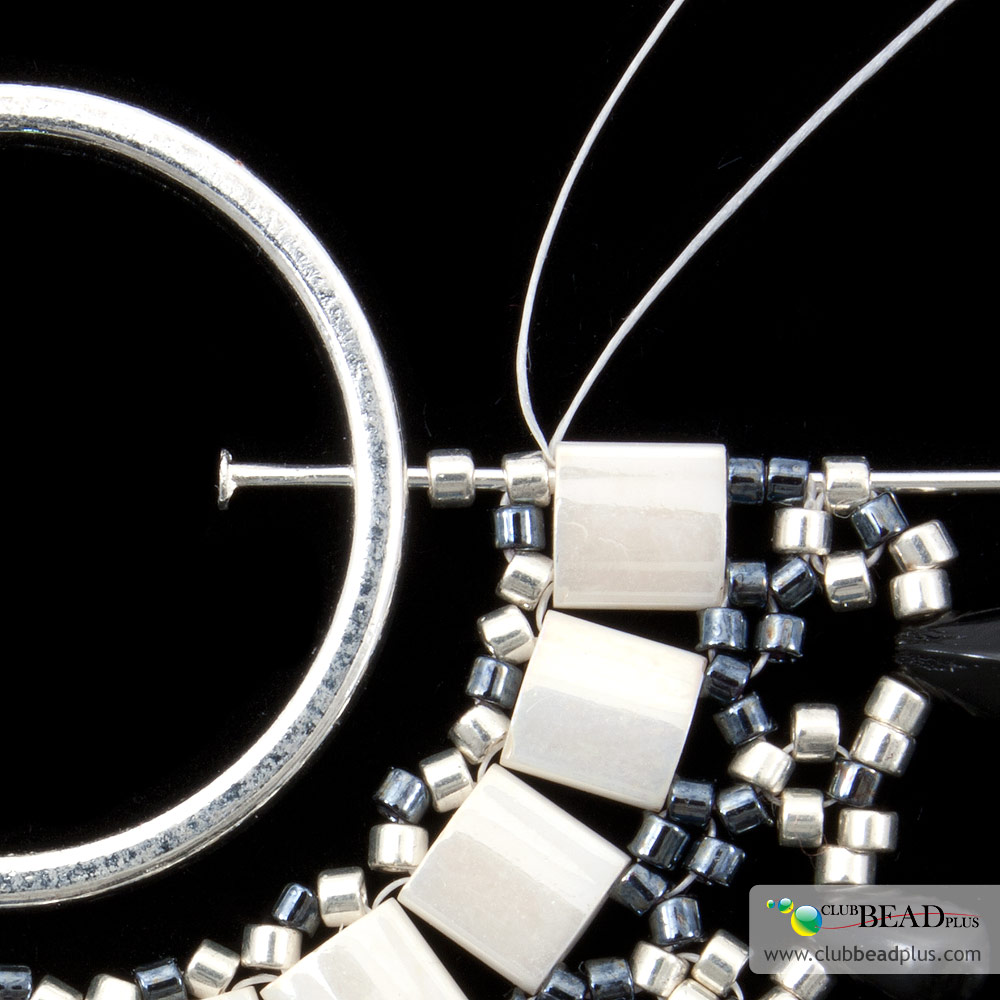
Insert a head pin in the metal ring, add a B bead and pass the head pin in the weaving as illustrated.
Step 16
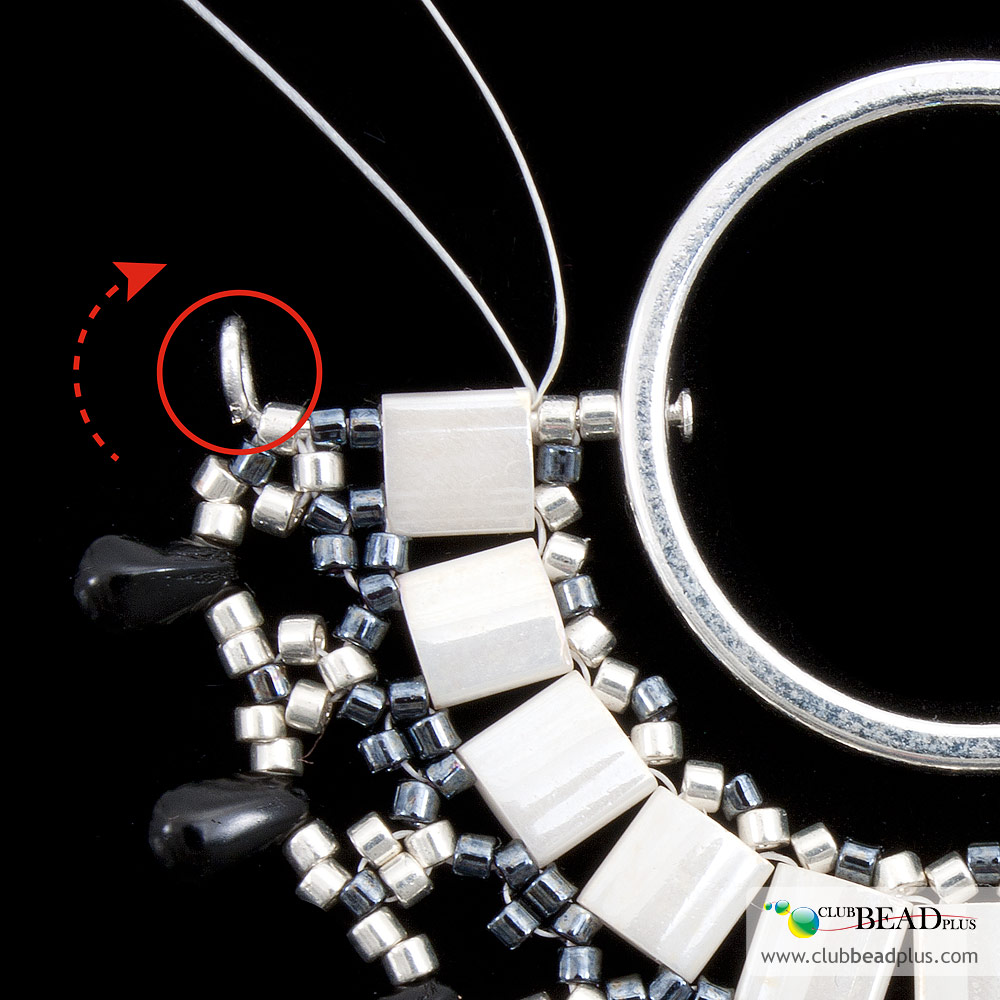
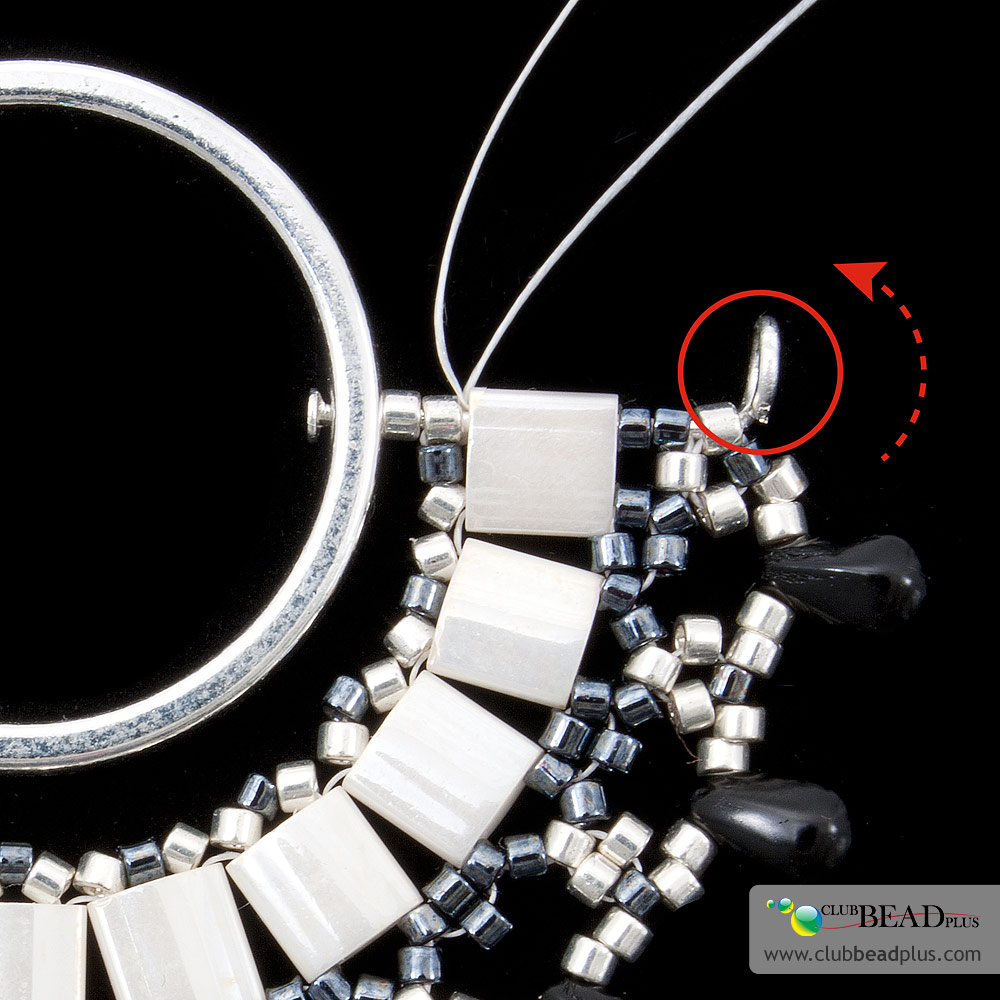
Make a loop* and orient it so that it is perpendicular to the weaving. Be careful not to put too much pressure with the loop on the beads strung on the head pin because the beads could break under the pressure.
*How to do a simple loop:
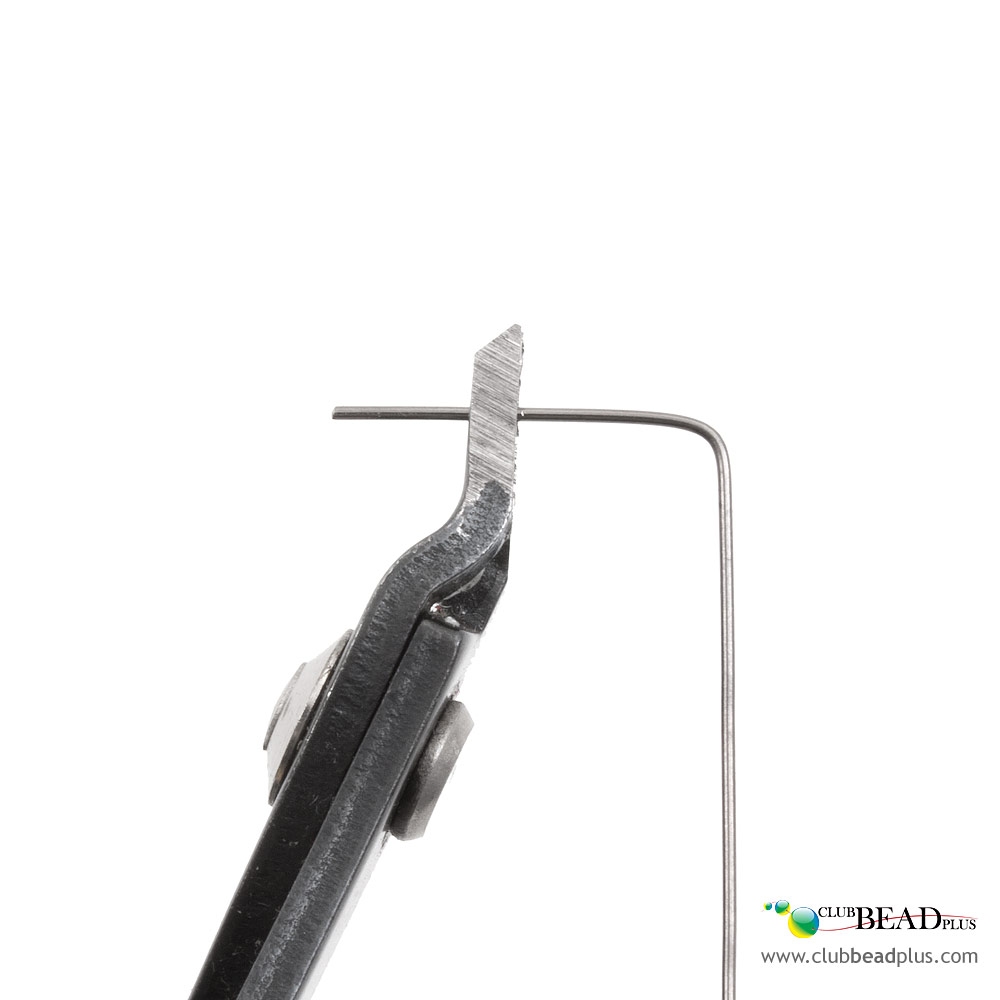
Where you want to make a loop, fold the head pin at 90° with your fingers. Cut the head pin at ± 8 mm.
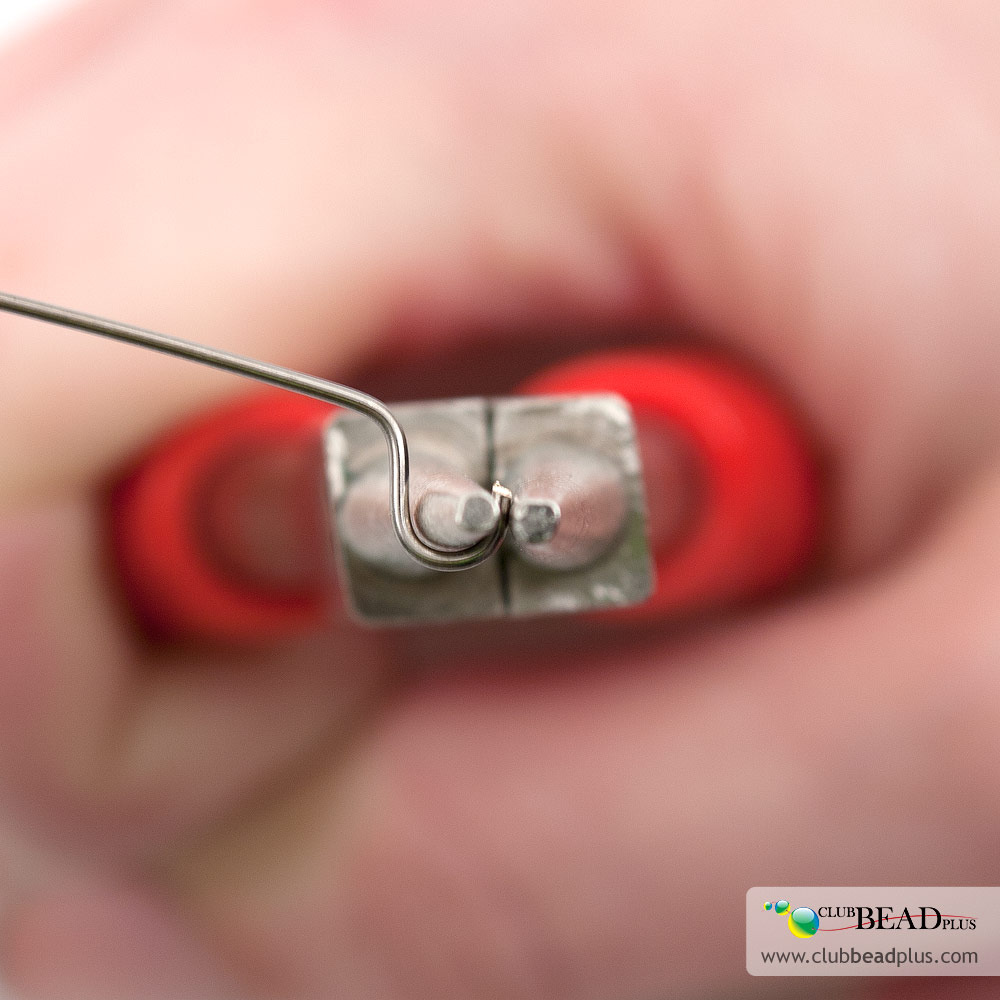
With the round nose pliers, pinch the tip of the head pin and twist it towards the middle of the bead to start a loop.
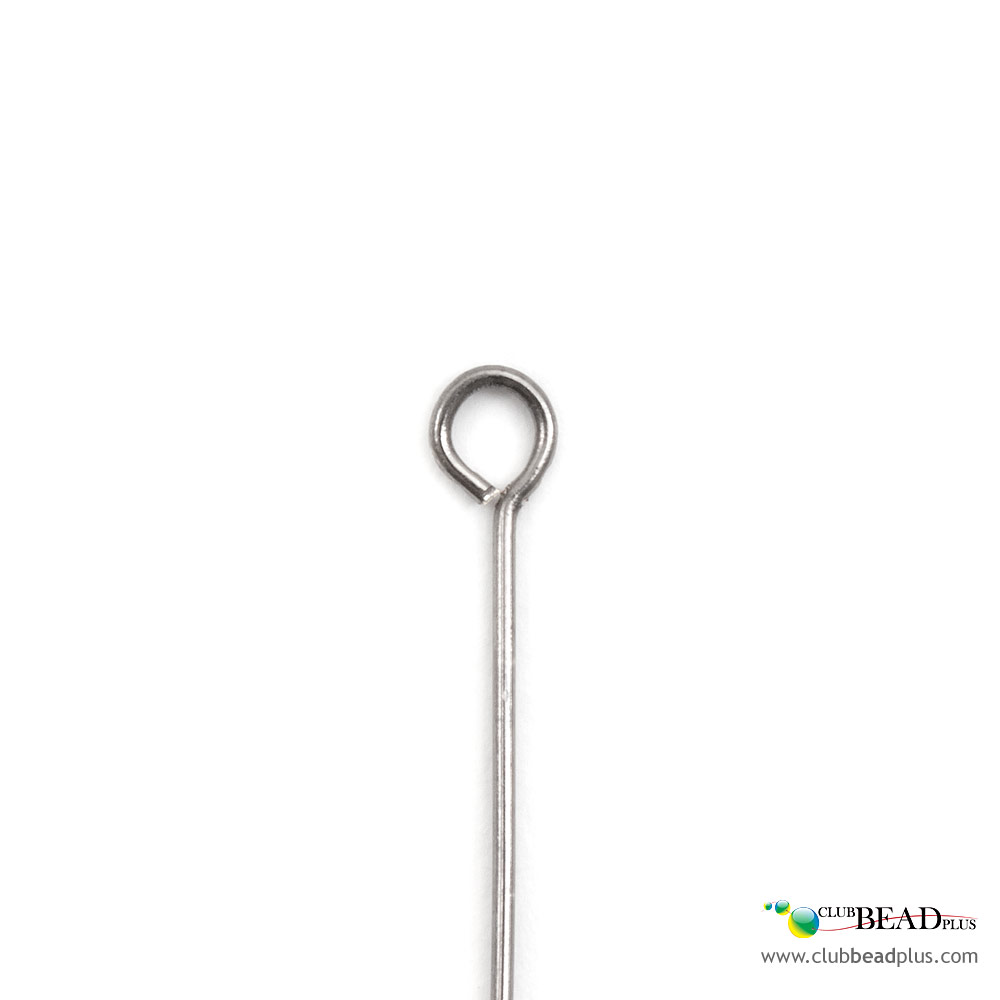
Fold it in the axis of the head pin. With the flat nosed pliers, if needed, straighten up the loop so that it is straight and closed.
Step 17
Tie the two ends of the string with a surgeon’s knot*. Drop a bit of transparent glue using the end of a needle. Cut any excess string.
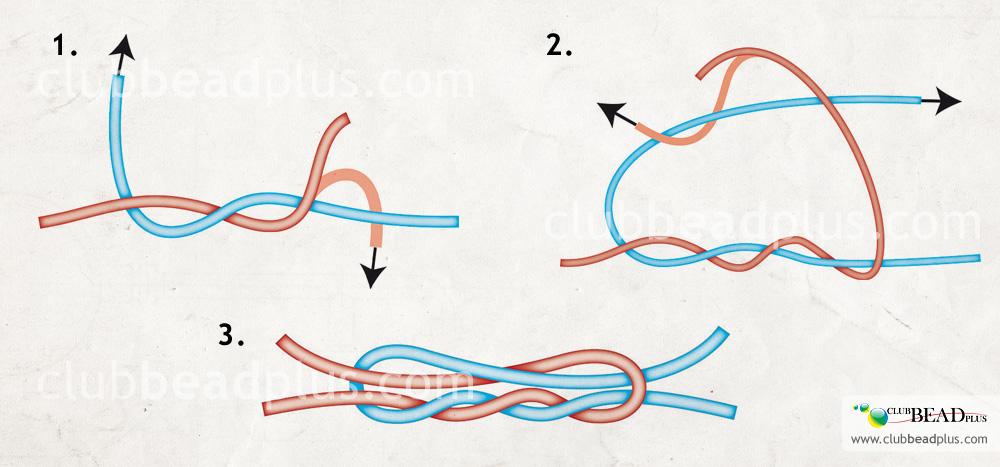
*How to make a surgeon’s knot:
The surgeon’s knot is derived from the flat knot. To make it, simply add an additional twist to the first overhand knot, which makes it sturdier than a regular flat knot. Then make a second overhand knot in the opposite direction and tighten everything.
Step 18
Repeat steps 15 to 16 for the other side of the weaving.
Finishing touches
Step 19
Measure and cut 2 segments of 50 cm chain or of the desired length. Insert the chain segments in the loops linked to the weaving.
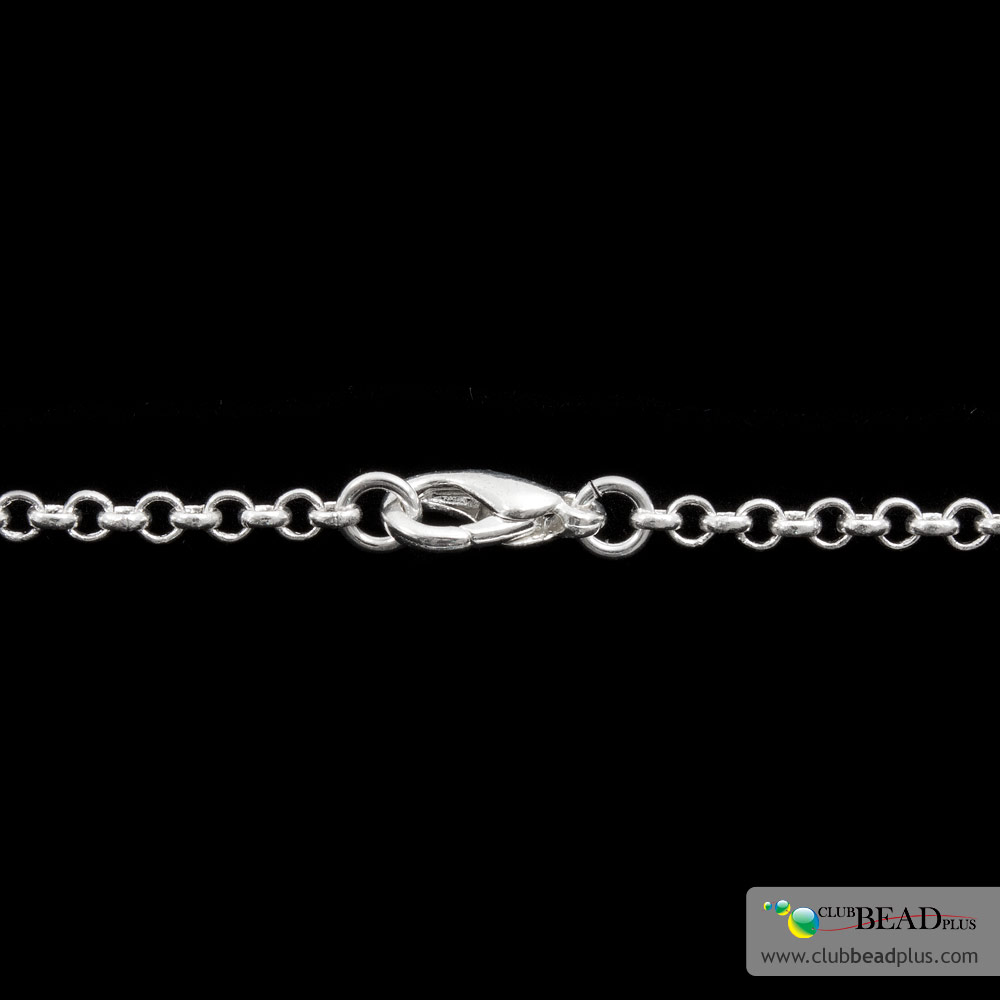
Step 20
Place the clasp on each extremity using 4 mm jump rings and flat nosed pliers.
Inspiration & Variation