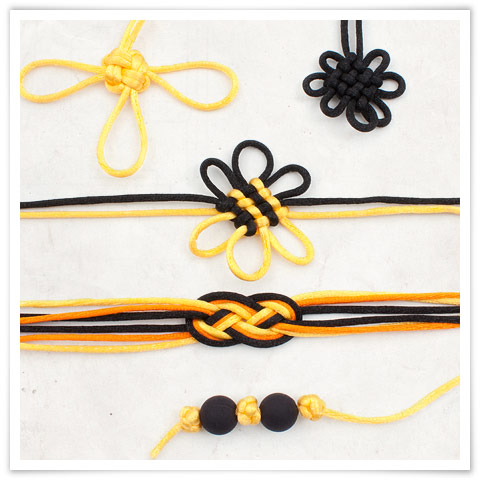
FREE SHIPPING for orders of $100 or more before tax across Canada. Addional charges may apply for remote areas.

VISUAL SEARCH

A unique tool to quickly find products with a few clicks.
Shapes
Colors
Materials
Recherche Visuelle

Decorative knots


Choice of cords
These knots can be made with various types of cords: rat tail, waxed cotton, hemp, leather or silk imitation. However, using rat-tail cord is recommended because it has a silky feel that makes it slide easily.

Work area
It is easier to make these knots working on a level surface such as a cork tray. If you do not have a surface on which to pin the cord, you can use masking tape to hold the cords in place.

Measures
The measures provided are essential to the realization of the knots. If you wish to use the knots to make a jewelry piece, you will need longer cords.


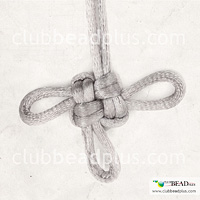
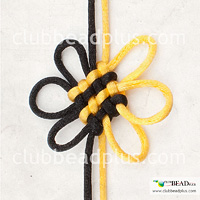
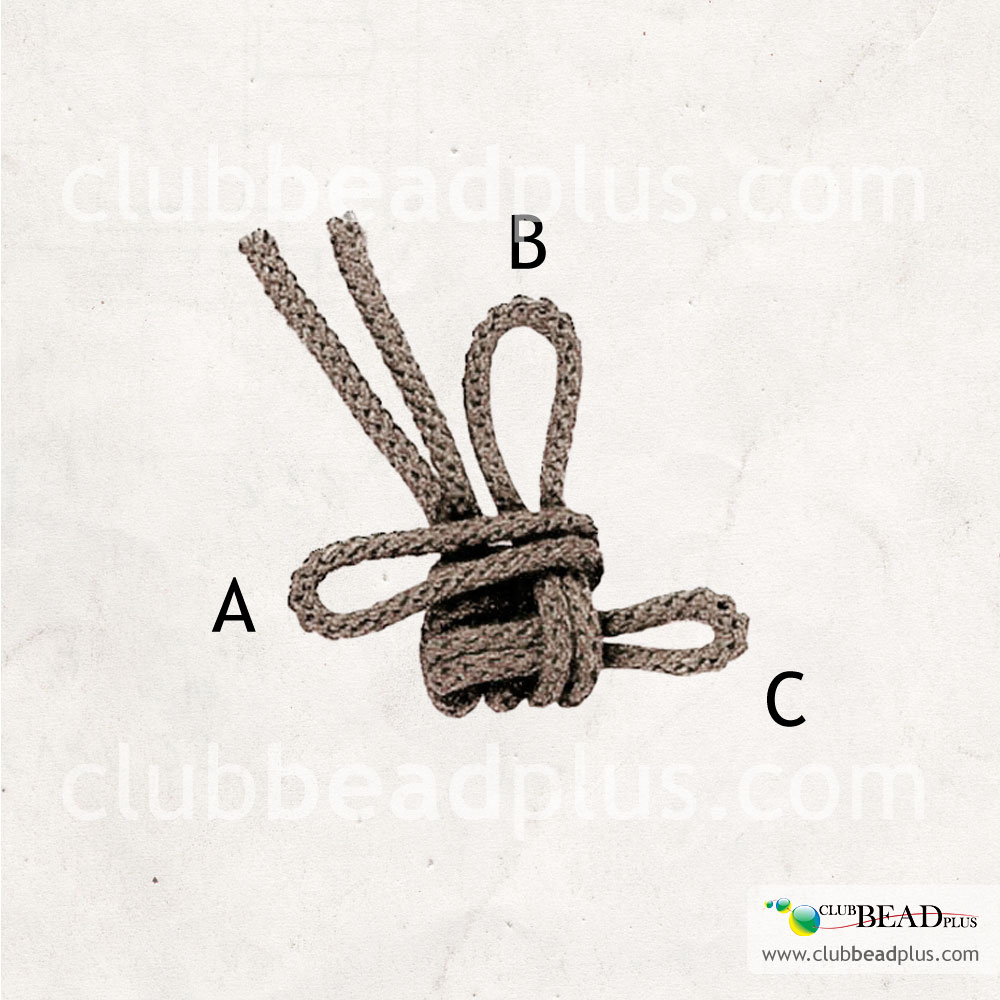
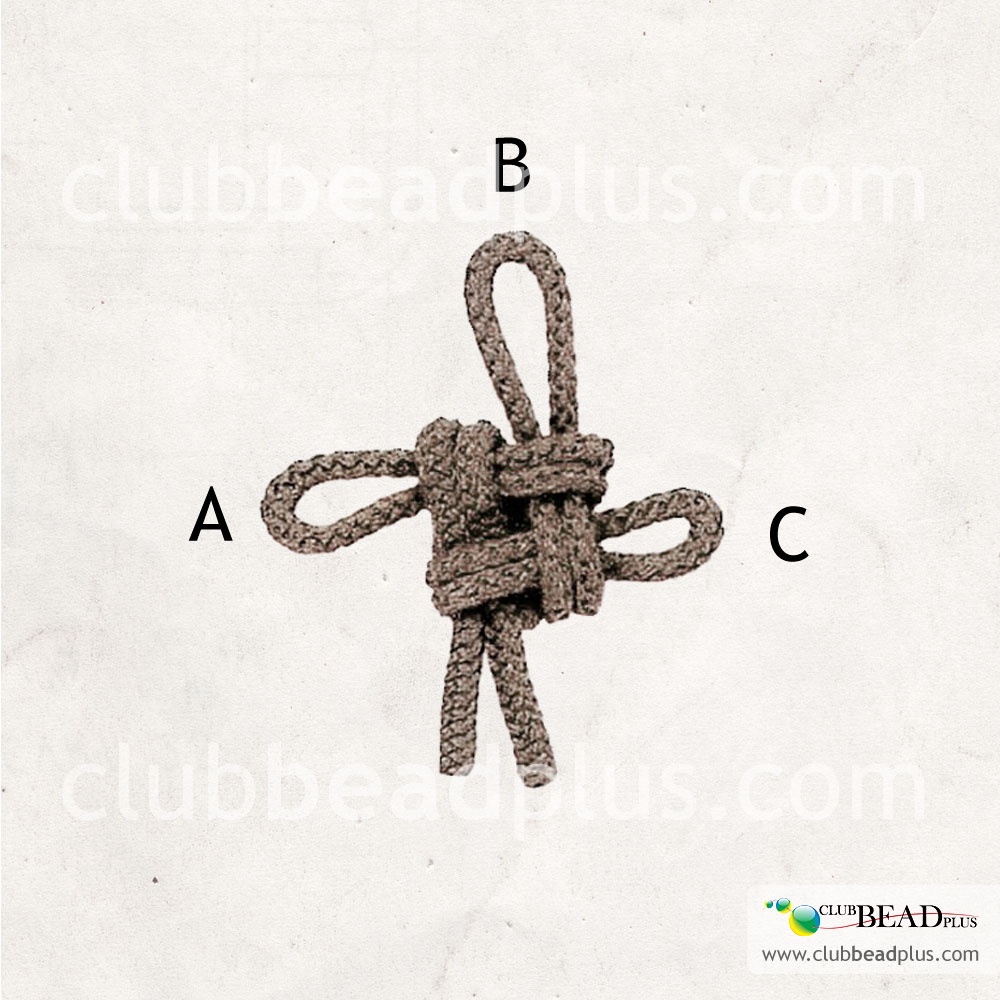
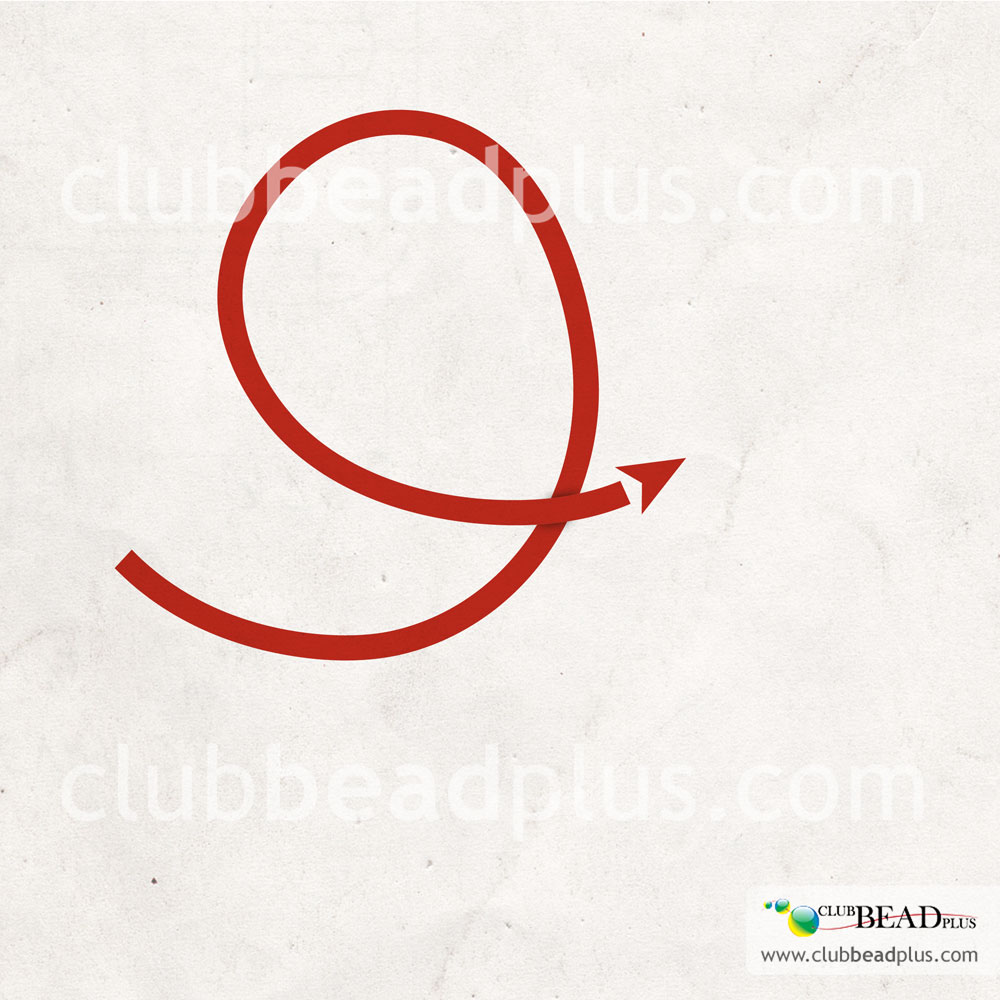
The Good Luck Knot(Chinese knot)


Preparation

Step 1
First, choose the size and color of the cords with which you wish to work. Measure and cut 60 cm of cord.

Making the knot

Step 2
At the center of the cord, form 3 equal loops that measure 6 cm each, so as to form a cross. Maintain the end and the hollow parts of the loops in place using ball head pins. Be careful, if the loops are not of equal lengths from the start, it will be noticeable when you are done.

Step 3
Fold the ends of cord towards the top by passing the ends over loop A, as illustrated. Keep the ends folded using pins.

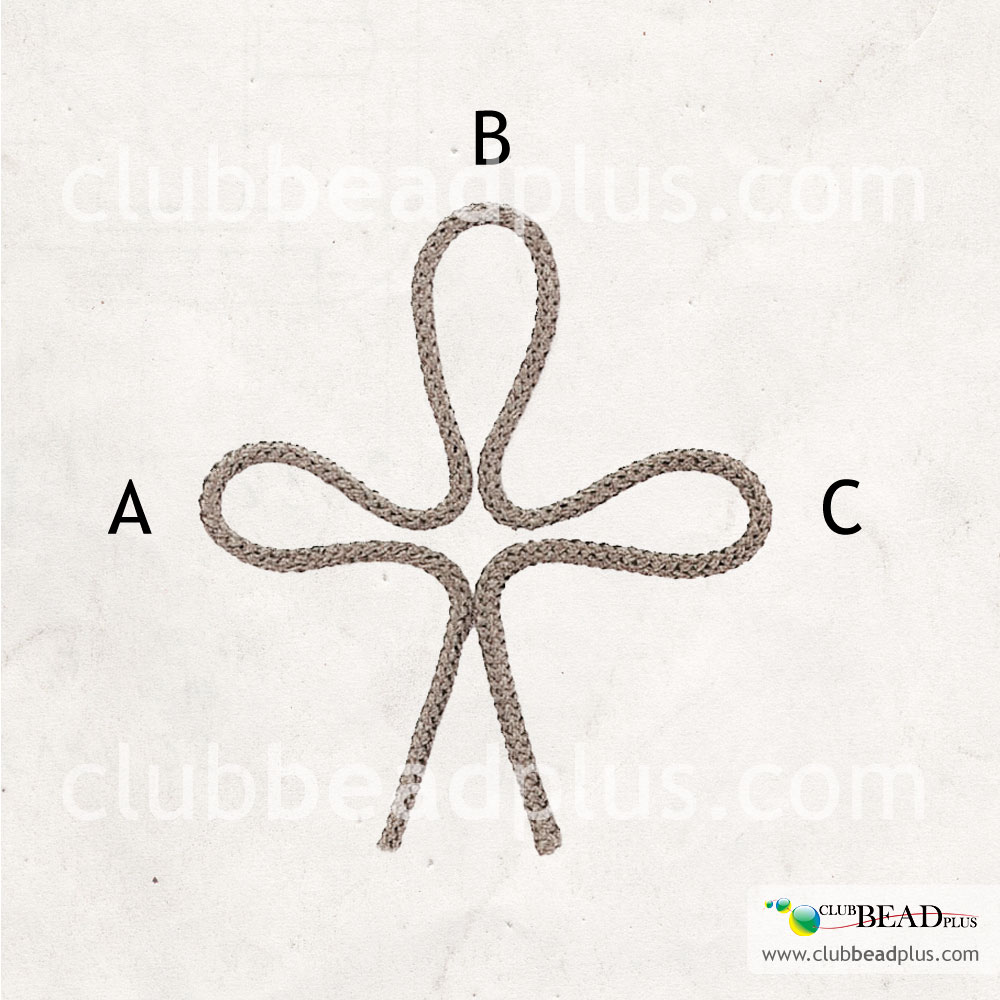
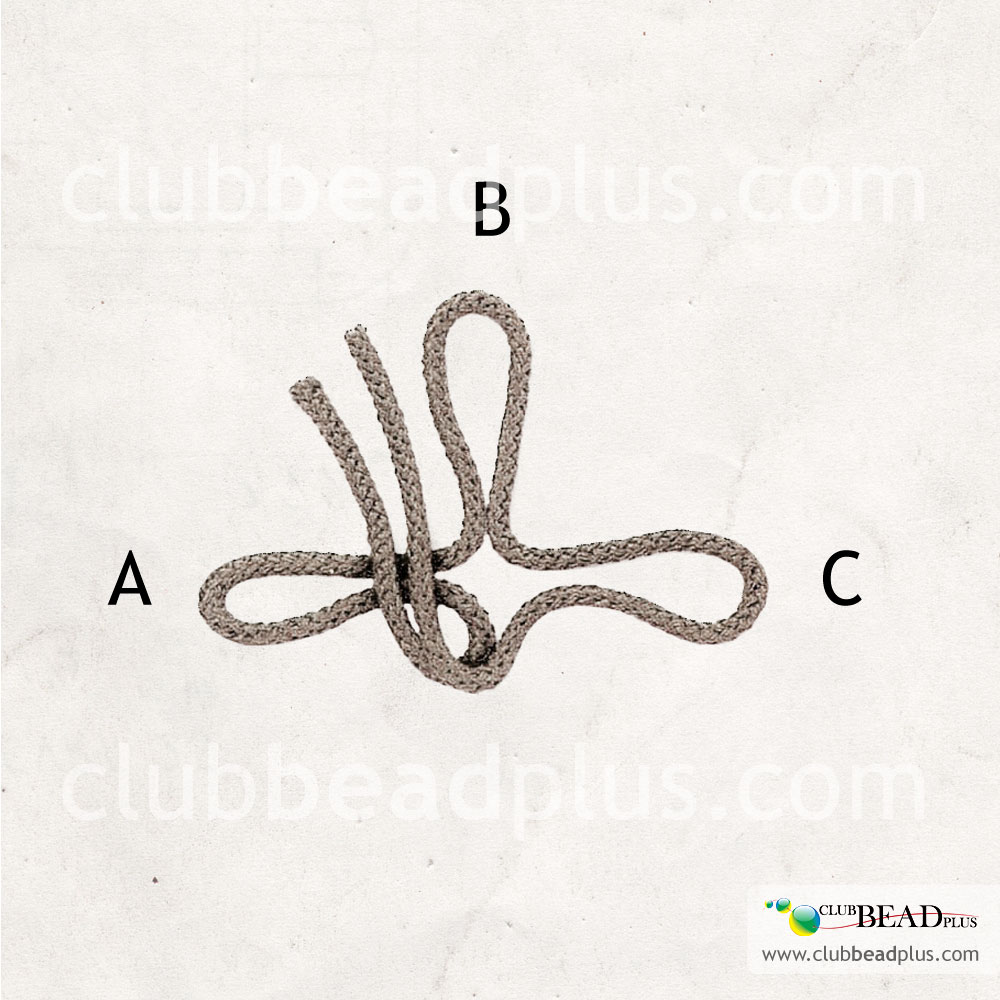
Tip :To get even knots you need to work meticulously. Pay attention to the tension that you apply on the cords, as you need to apply the same tension as you go.


Step 4
Remove the pin that holds loop A, then fold it towards the right by passing over loop B, as illustrated. Replace the pin to keep loop A in place again.

Step 5
Remove the pin that holds loop B, then fold it towards the bottom by passing it over loop A and C, as illustrated. Replace the pin to keep loop B in place again.

Step 6
Then, fold loop C towards the left by passing it over loop B, then pass it inside the loop created by the cord’s ends, as illustrated.

Step 7
Gently remove all the pins that keep the loops in place and retighten the knot by pulling on each loop as well as each cord’s extremity.
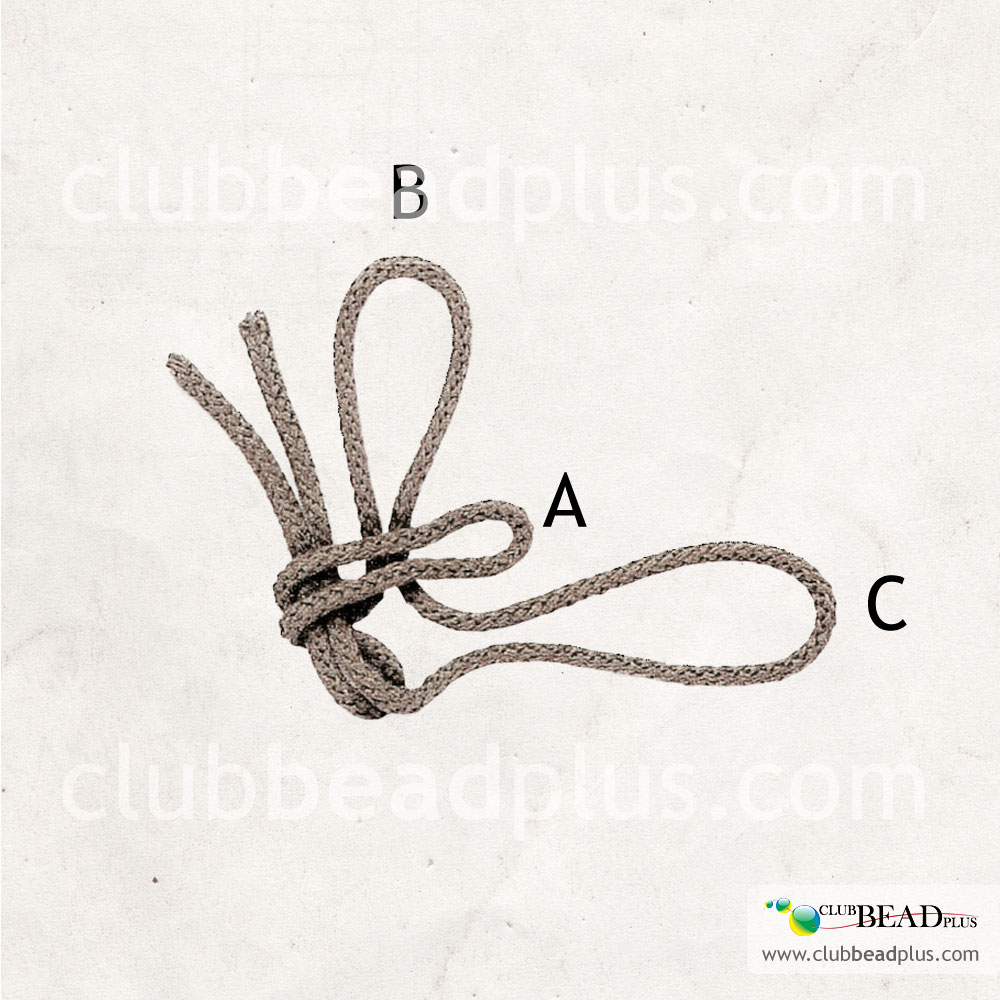
Once the knot has been tightened, reposition the pins on loop A and B.

Step 8
Fold loop C towards the right by passing it over loop B then fold loop B upward.

Step 9
Then, fold loop A towards the left.

Step 10
Finally, fold the ends of the cord towards the bottom, then pass them in the fold of loop C. If needed, use the tweezers to grab the cord’s extremities and pass them with ease in the fold of loop C. Remove all the pins and tighten the knot by pulling on each loop as well as the cord’s extremities.


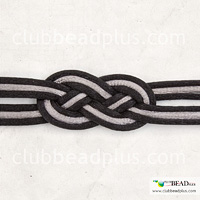
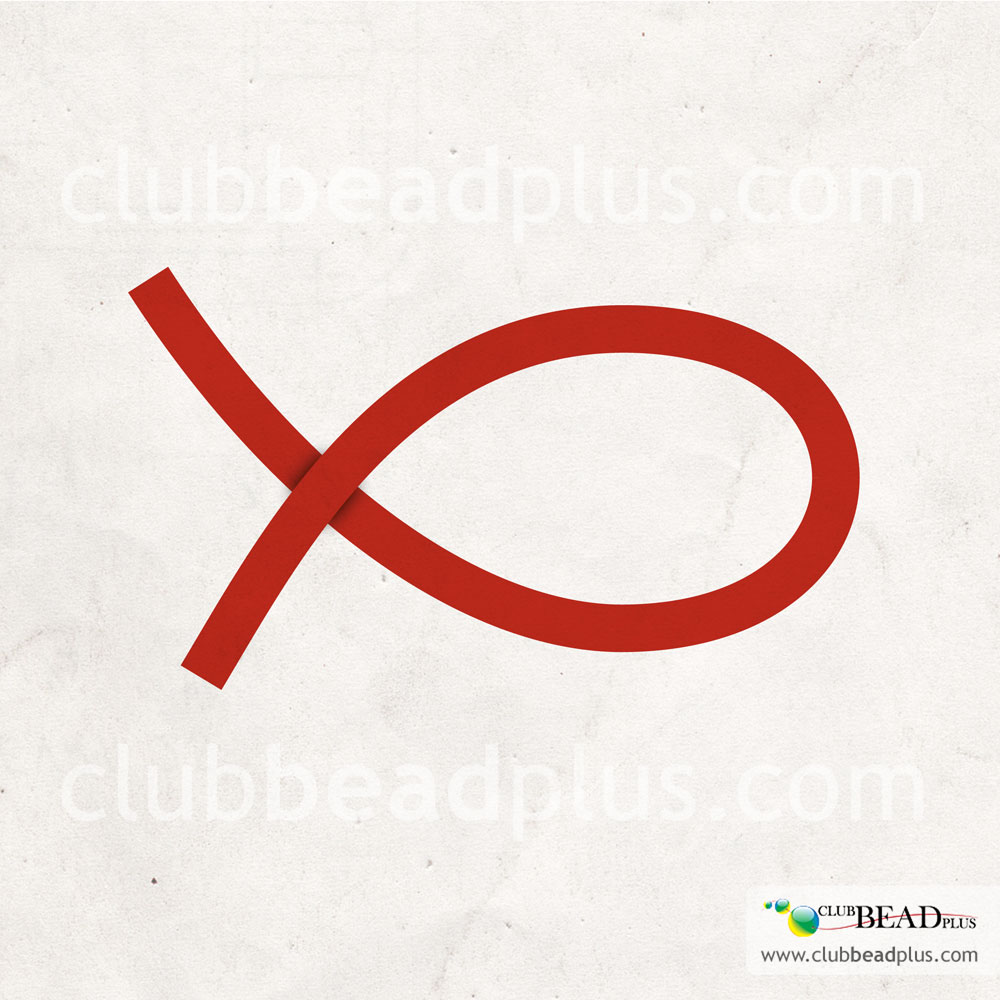
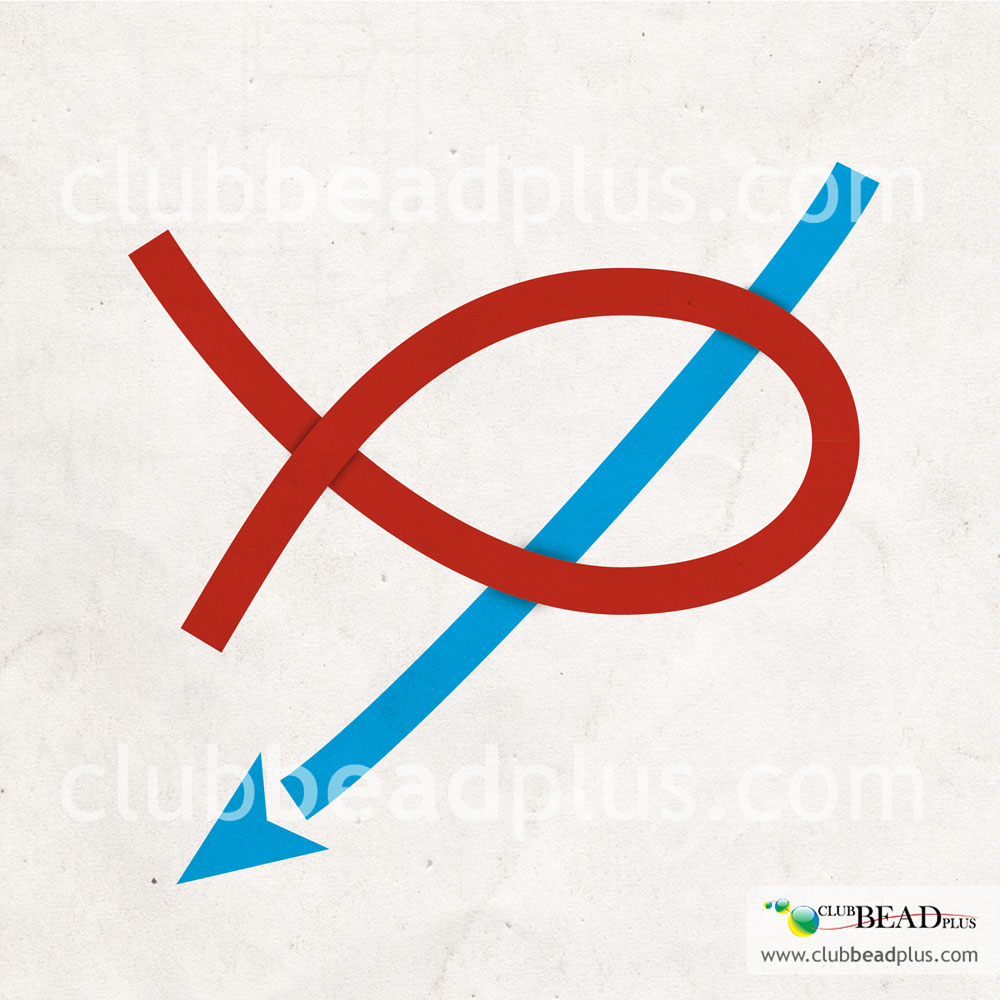
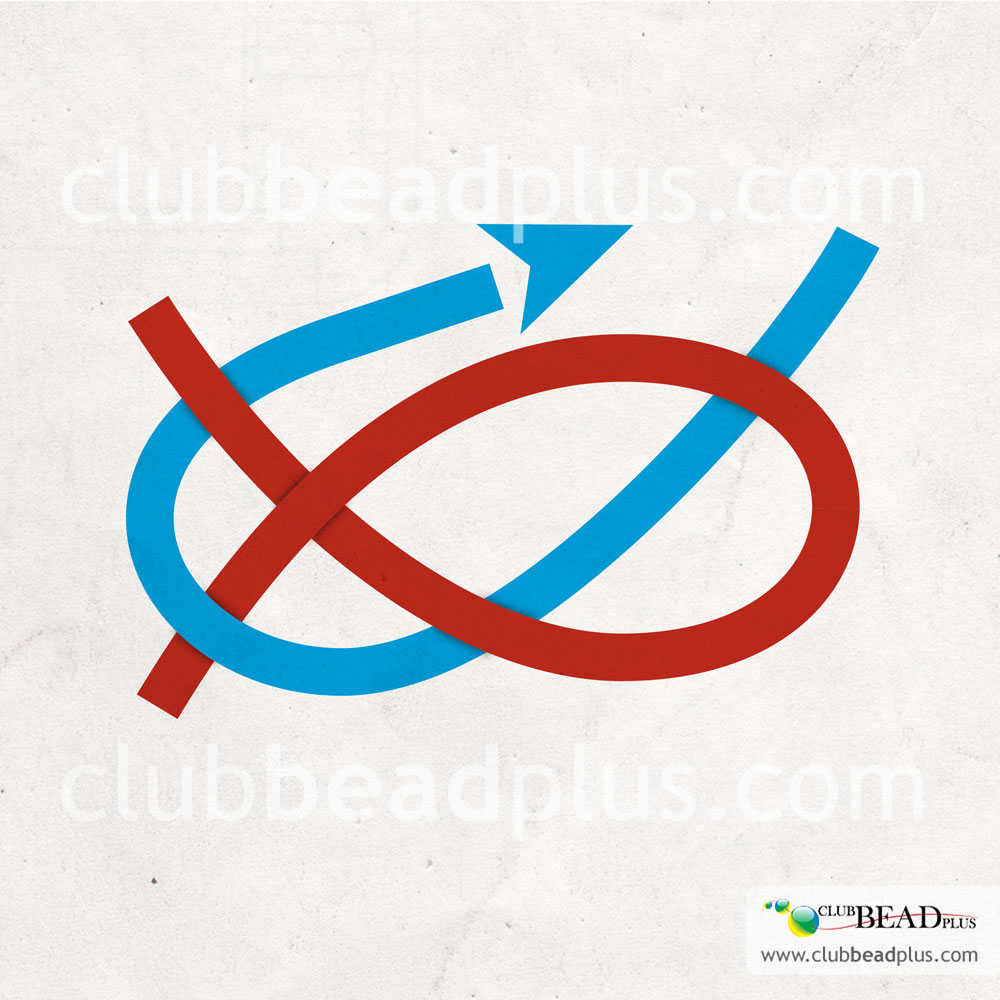
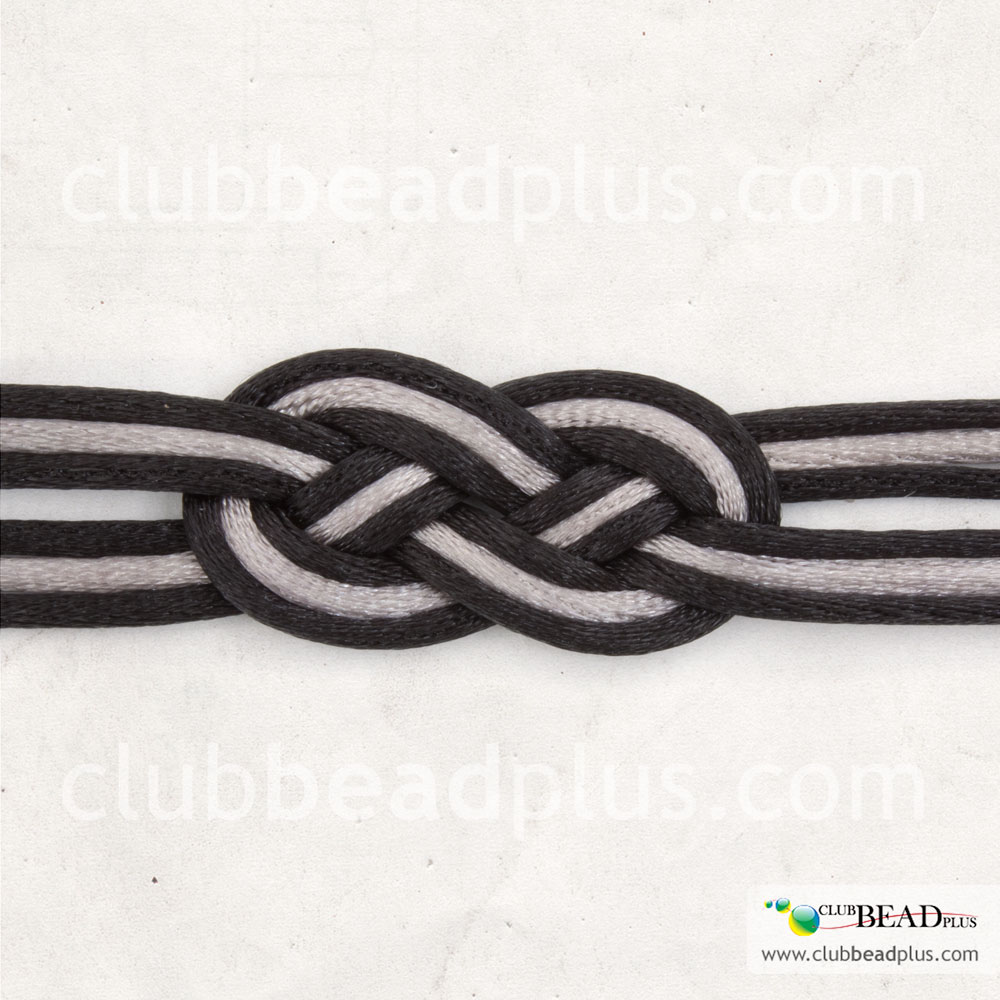
The Carrick bend(Sailors knot)


Preparation

The following knot can be made with 2 pieces of cord of equal length and size. You can however, make it with several cords of equal size but various colors to add a bit of volume and fantasy.

Step 1
First, choose the cords you would like to work with. Measure and cut 2 pieces of cord that measure about 30 cm in length.

Making the knot

Step 2
Fold one of the two cords in two to form a loop. Make sure that the ends cross, as illustrated. Keep each end on the work area, using pins or masking tape.

Step 3
Take the other cord and pass the extremity under the loop that was made at the previous step.

Step 4
Then, pass that cord over and under the ends of the first loop, as illustrated.

Step 5
Keep on going by passing the cord over the first loop and under the other end of this cord then, pass it again over the other side of the first loop, as illustrated.

Step 6
Gently pull on the four ends of the cord to make the knot. If you have several cords, make sure that they are positioned laying flat before tightening the knot. If needed, loosen the knot, correct the position of the cords and then retighten.

Step 7
This is what a Carrick bend looks like when pressure or weight is applied to the cords.


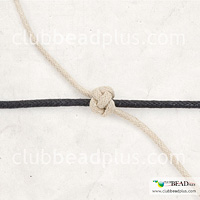
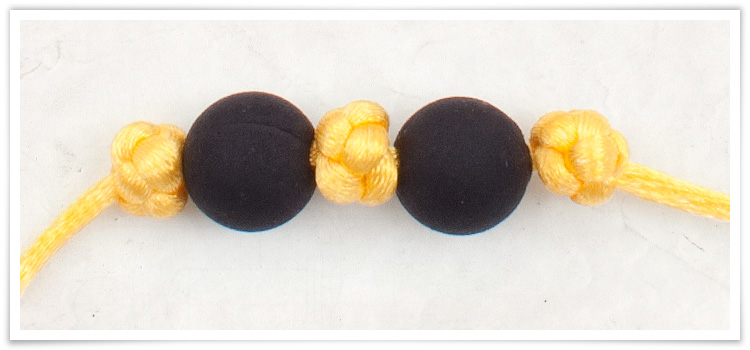
The Celtic Button Knot(Celtic knot)


Preparation

Step 1
First, choose the cords you would like to work with. Measure and cut 30 cm of cord.

Making the knot

Step 2
Make the first loop, as illustrated, at about 10 cm from one end of the cord. Pin the loop so it stays put.

Step 3
Form a second loop by passing it over the first loop. It is important to position the cord as illustrated.

Step 4
Make a third loop by positioning the cord as illustrated on the two following images.

Tip :If needed, take the end of the cord using the tweezers to pass the cord through the loops with more ease.


Step 5
Form a fourth and last loop by positioning your cord as illustrated on the following two images. Once more, make sure that the cord is positioned as illustrated. Pay attention to the way the cords cross whether over or under the loop. When everything is in place, remove the pins that hold the loops.

Step 6
Gently pull on the cord’s ends to retighten the knot. When you are no longer able to pull, a loop will remain visible. Pull progressively on the cord of the loop by following its path to make any excess cord disappear and to fully tighten the loop. If needed, pull on the cords’ ends. You can use the tweezers to pull on the cords’ loops to tighten them.

Step 7
To move the knot on the cord and position it next to a bead, first find the exact place where to start pulling on the cord to reduce the space between the knot and the bead. Then, bring the knot at the desired place by moving progressively the excess cord, loop after loop, then tighten the knot.

Step 8
To make a Celtic button knot that you can slide on a cord, simply make a knot around a support cord. You can also add a support cord once the loops are formed. The support cord must be positioned as illustrated.


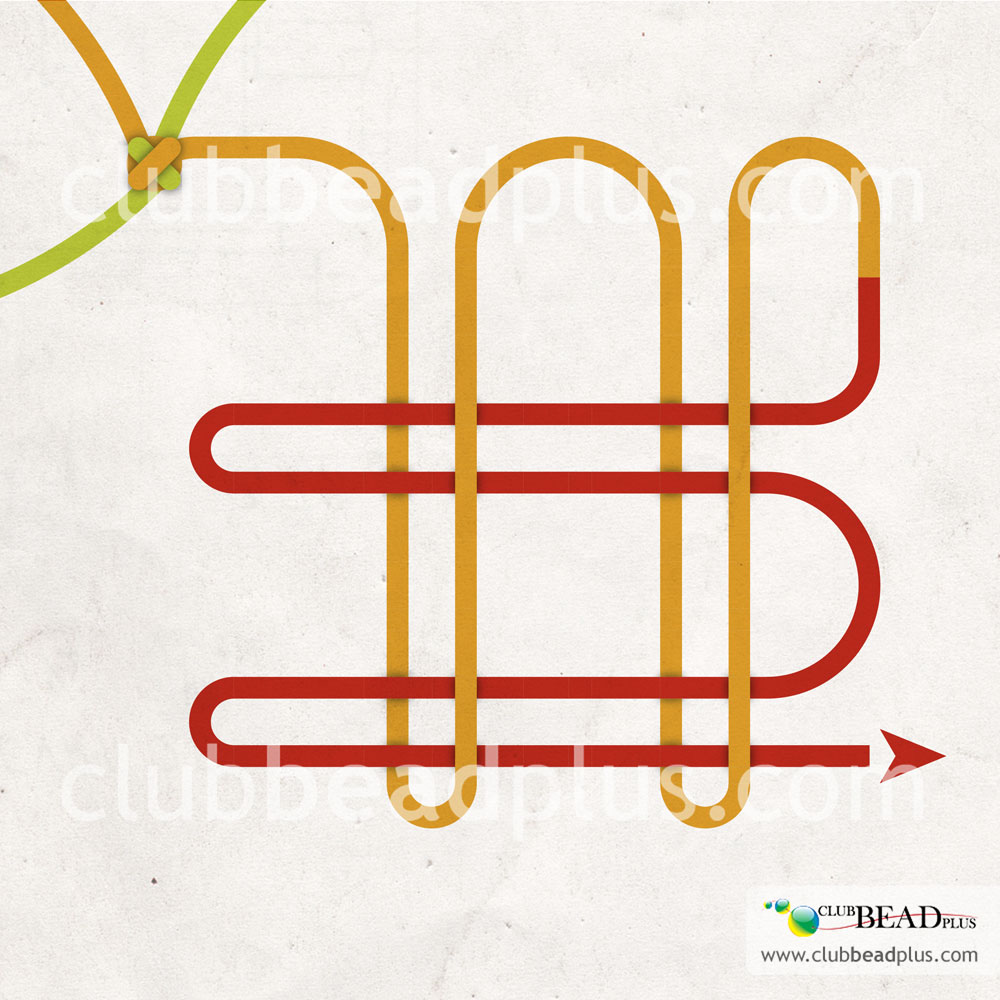
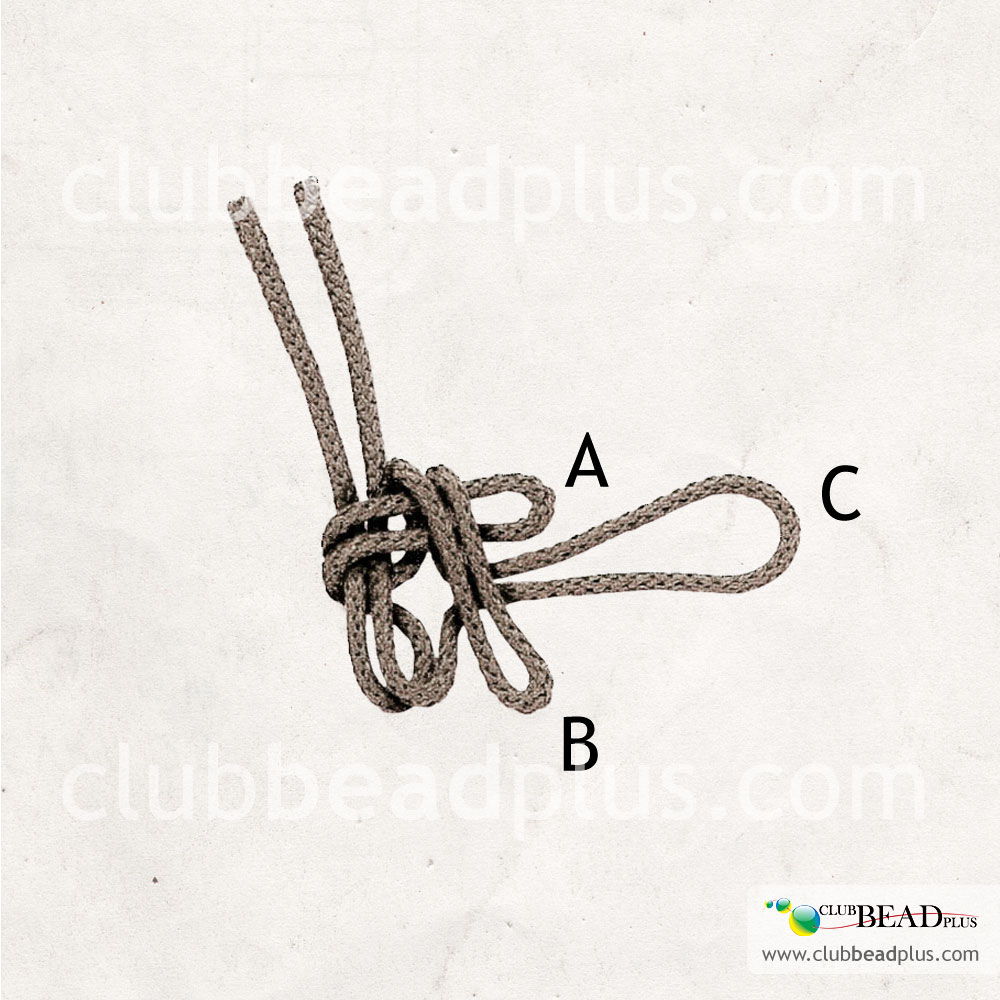
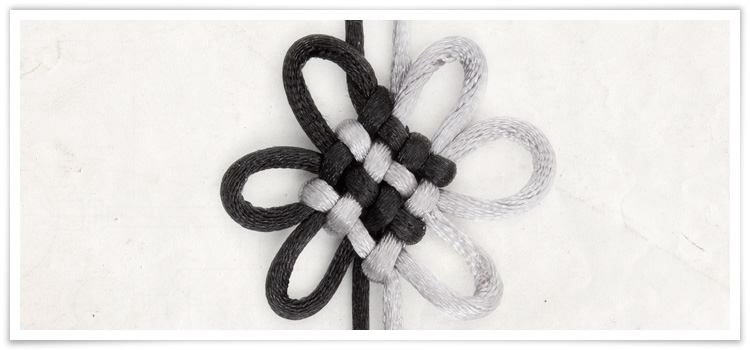
The Pan Chang Knot(Chinese knot)


Preparation

Step 1

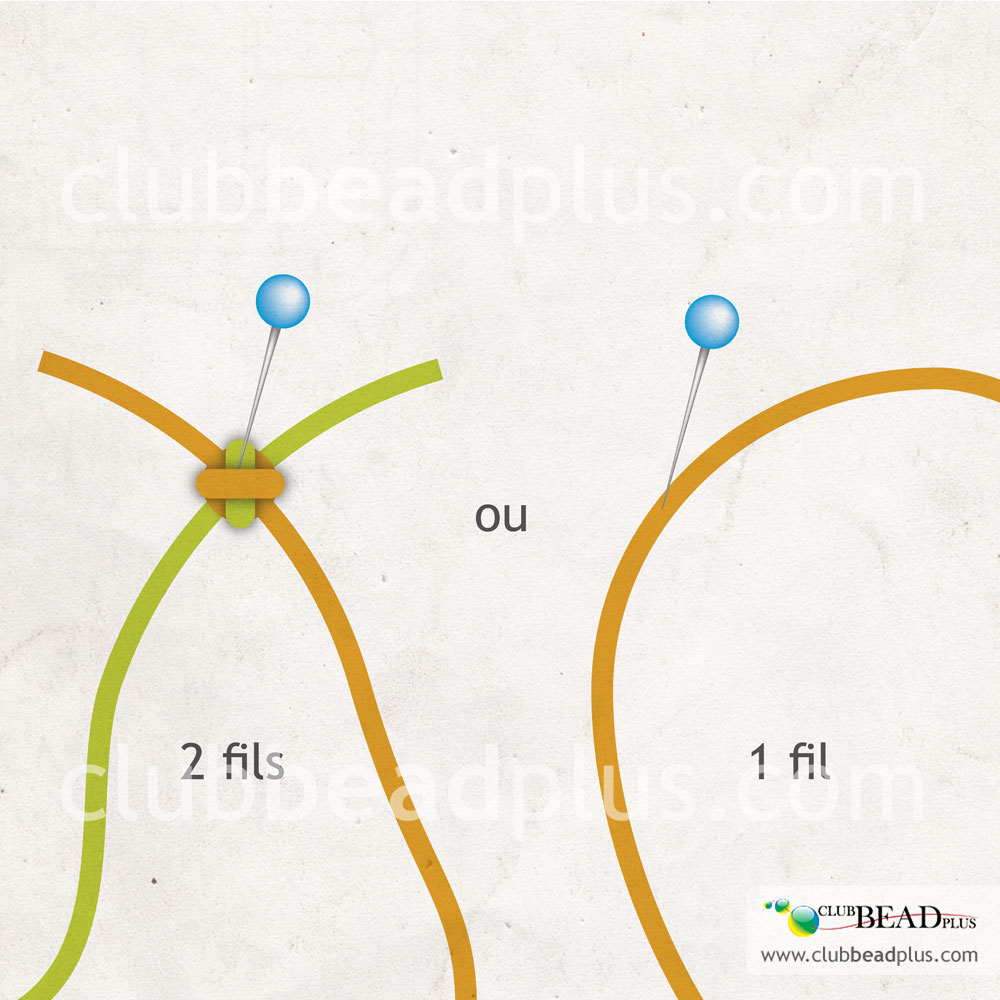
First, choose the cords you would like to work with. If this is your first time, it is recommended to work with two cords of different colors. Measure and cut 90 cm of each cord’s color or 180 cm of one cord.

To make this knot, it is essential to pin your cord on a working surface such as a cork tray because it requires practice and attention. Pin the cord after each step.

Since this knot requires a lot of threading, to ease the making of the pattern, it is recommended to harden the end of the cords to create makeshift needles. To harden the ends, you can burn them (if it is a cord made of synthetic fibers) or you can apply a drop of glue on each end of the cord and let them dry.
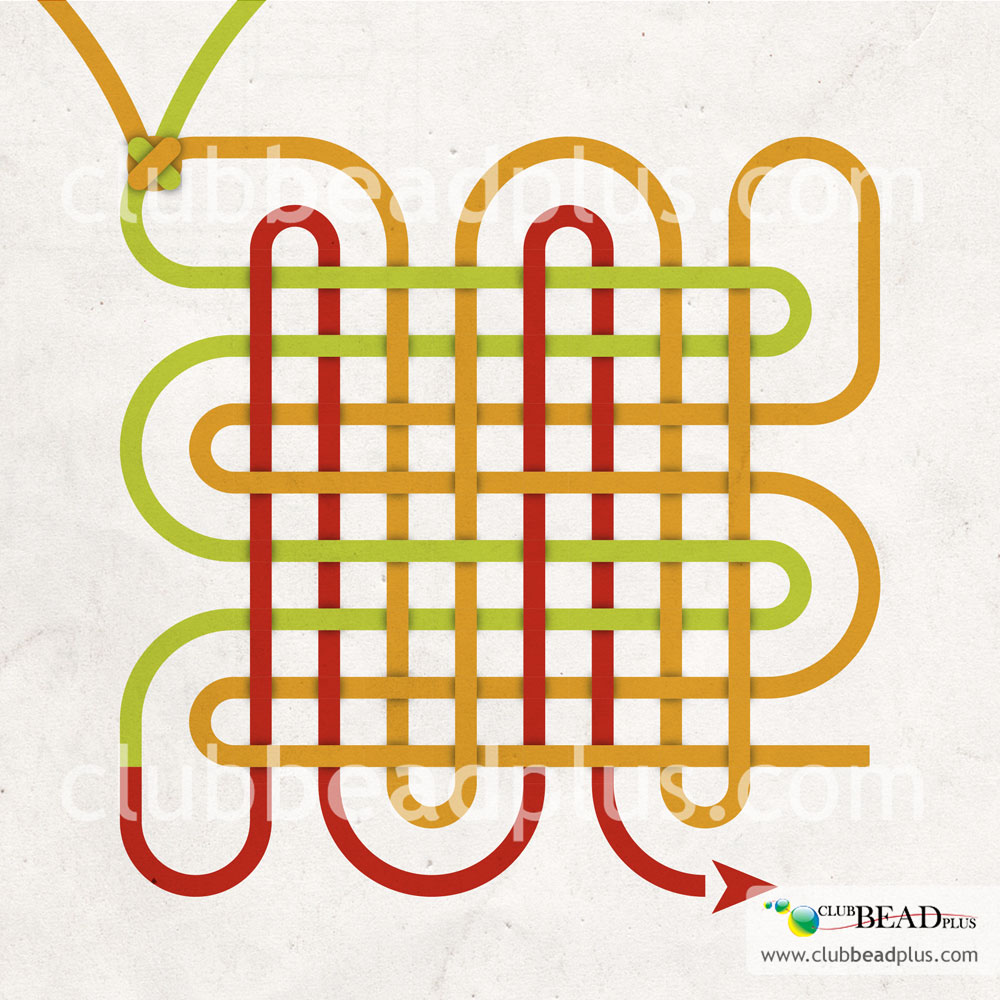
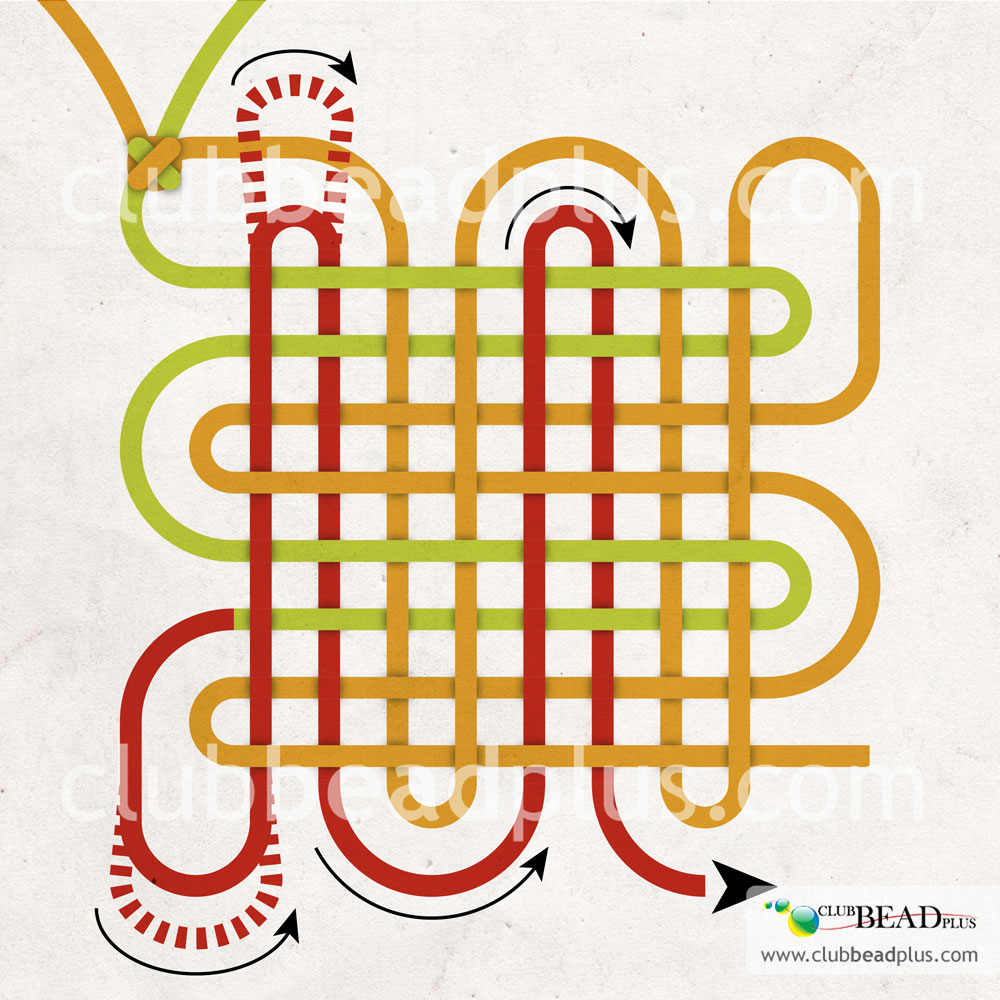
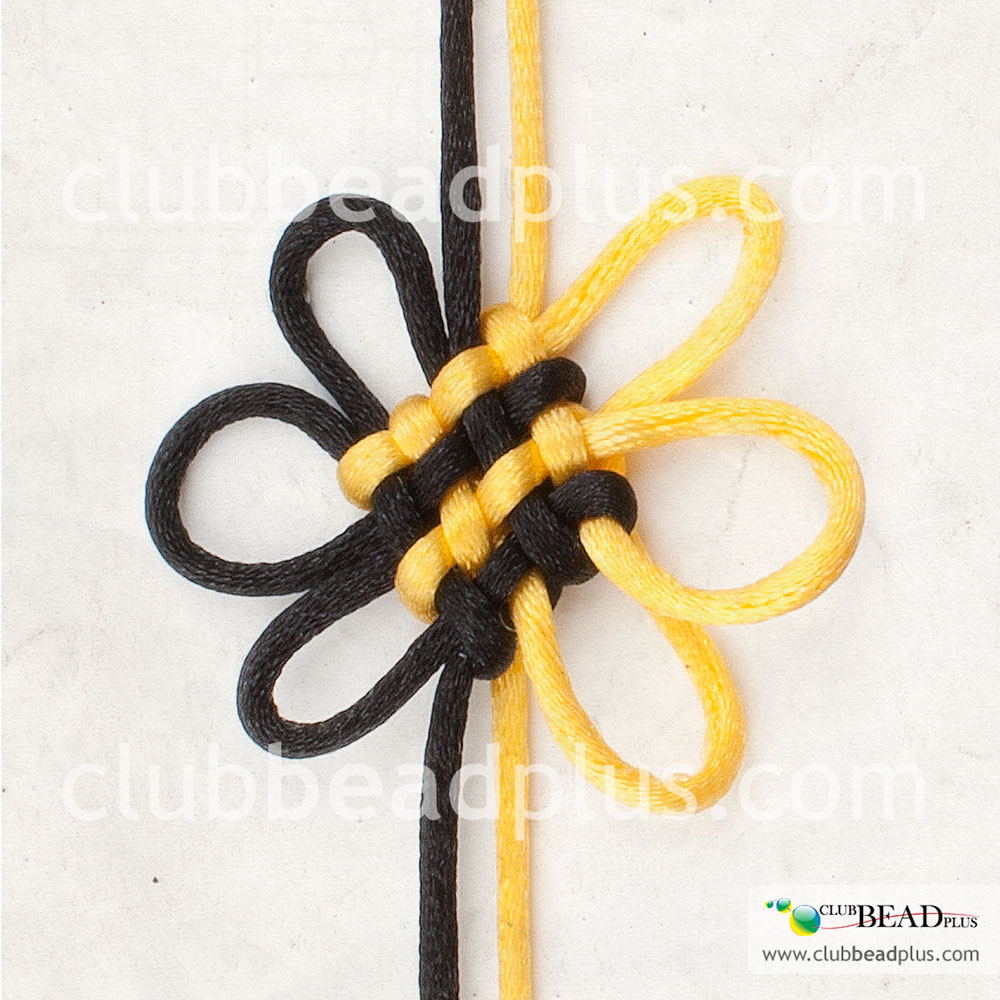
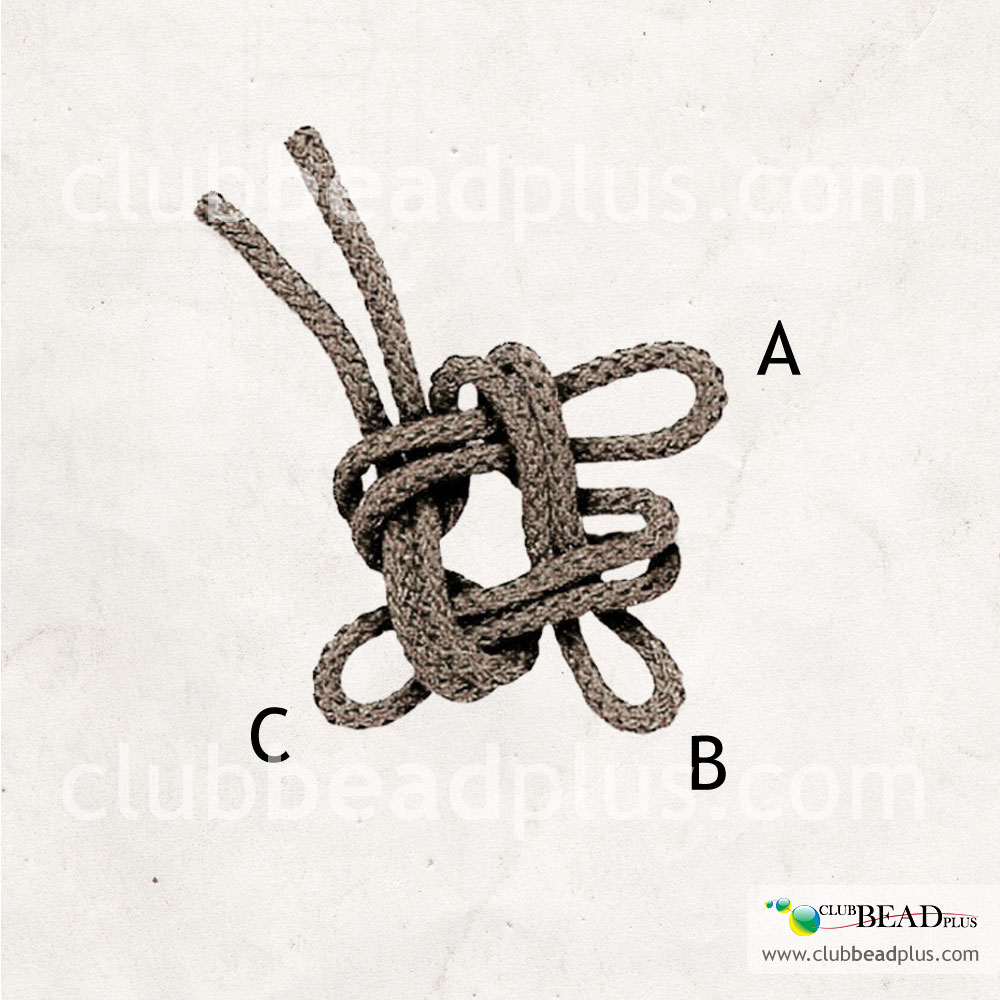
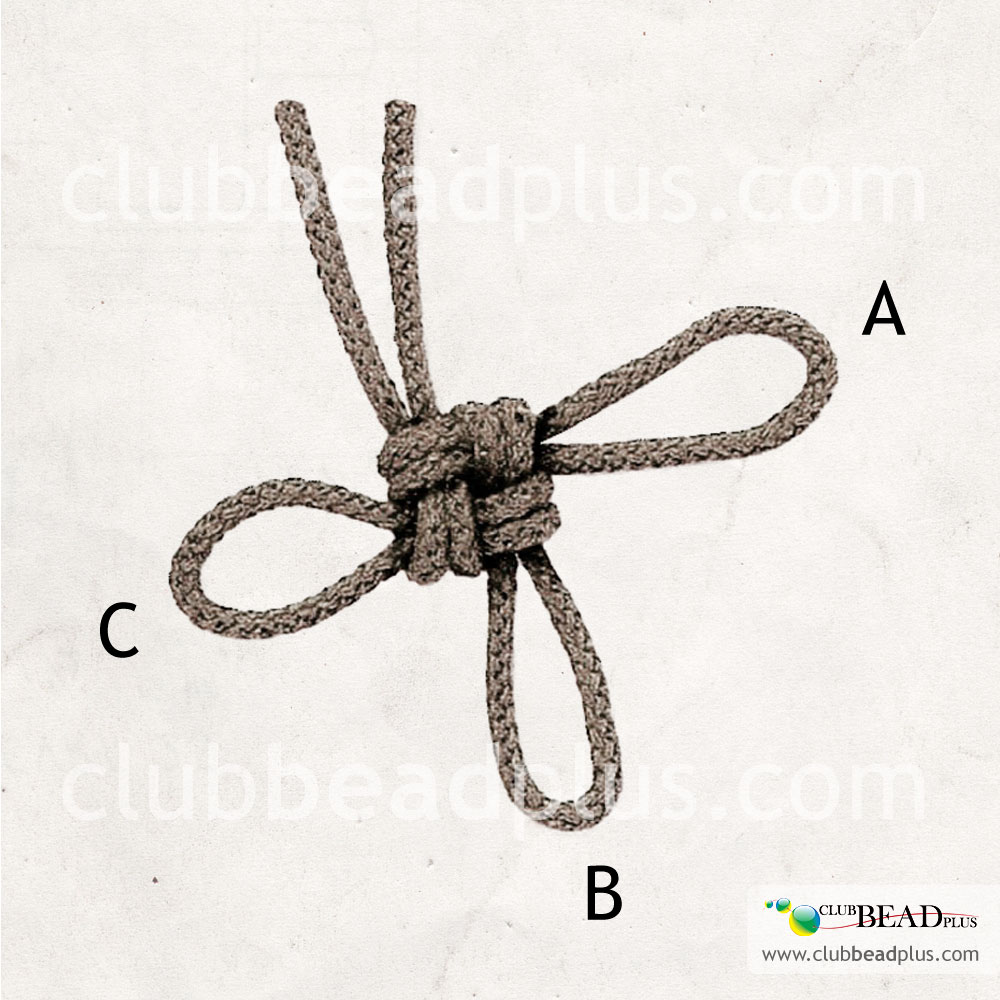
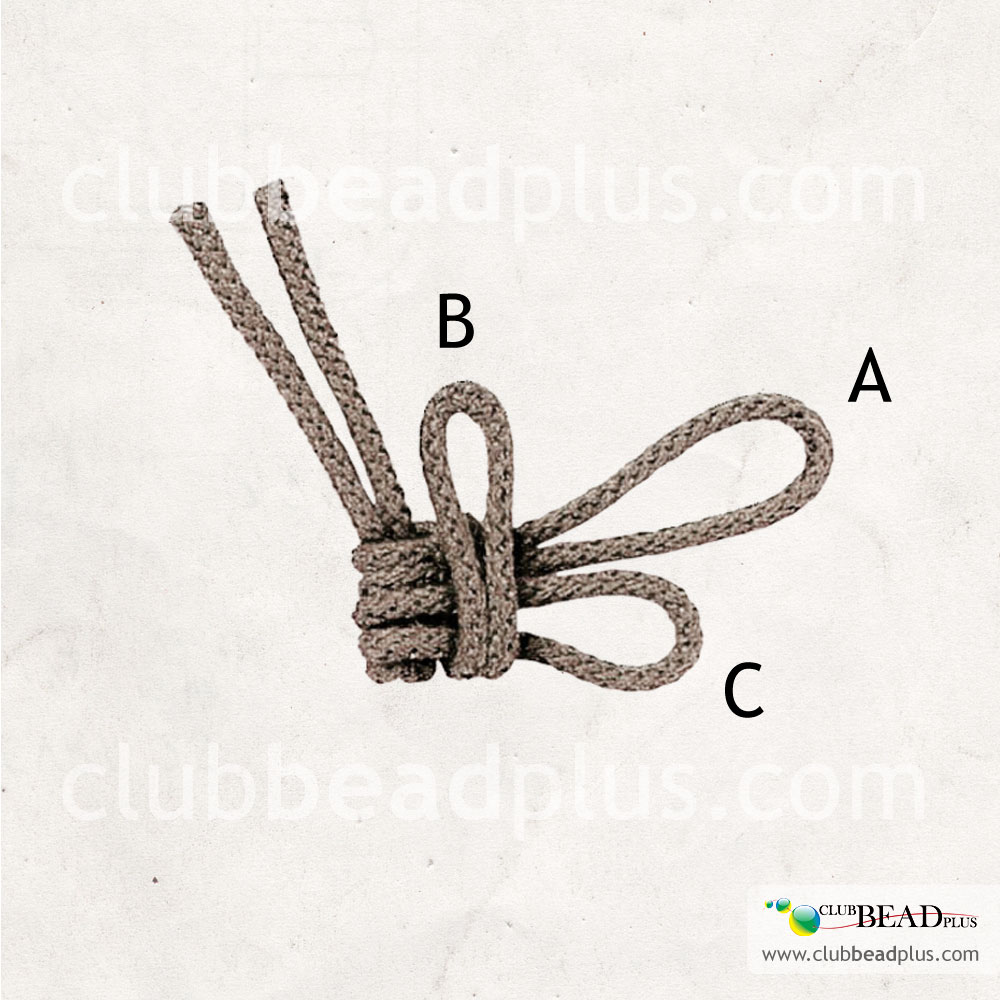
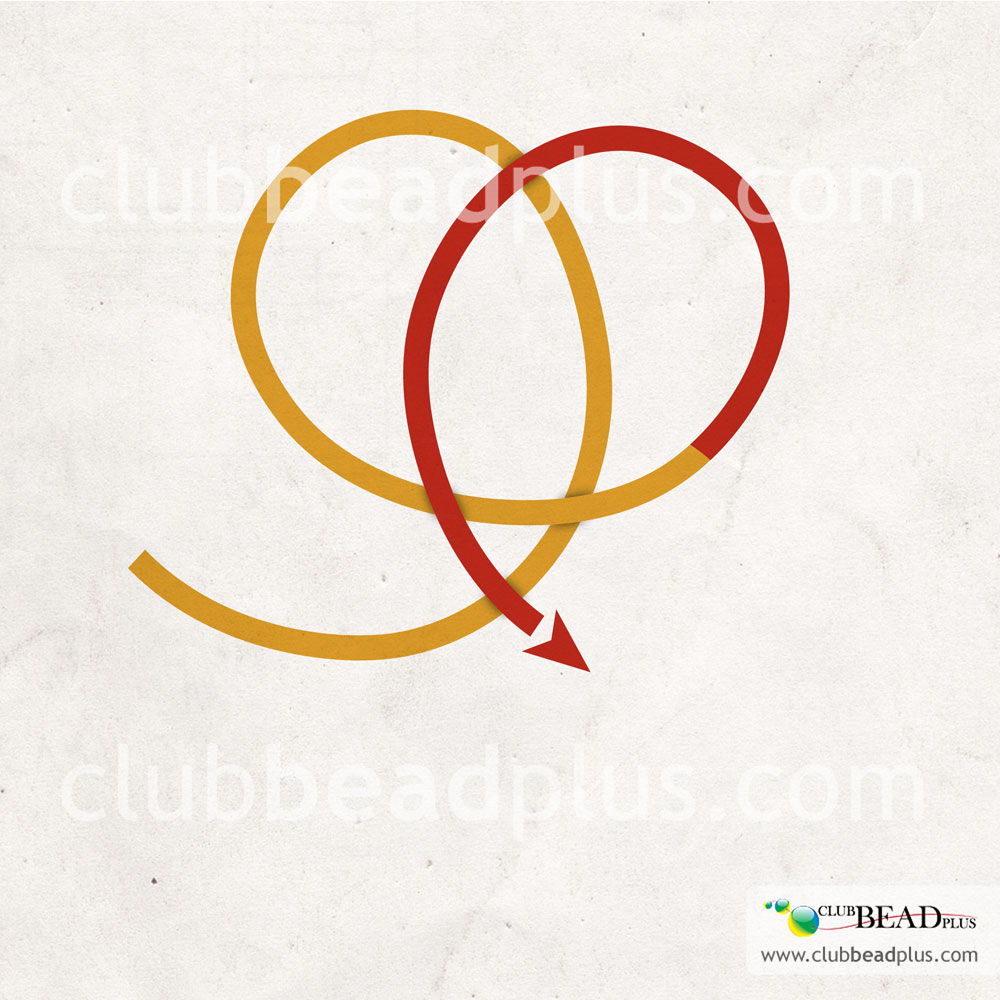
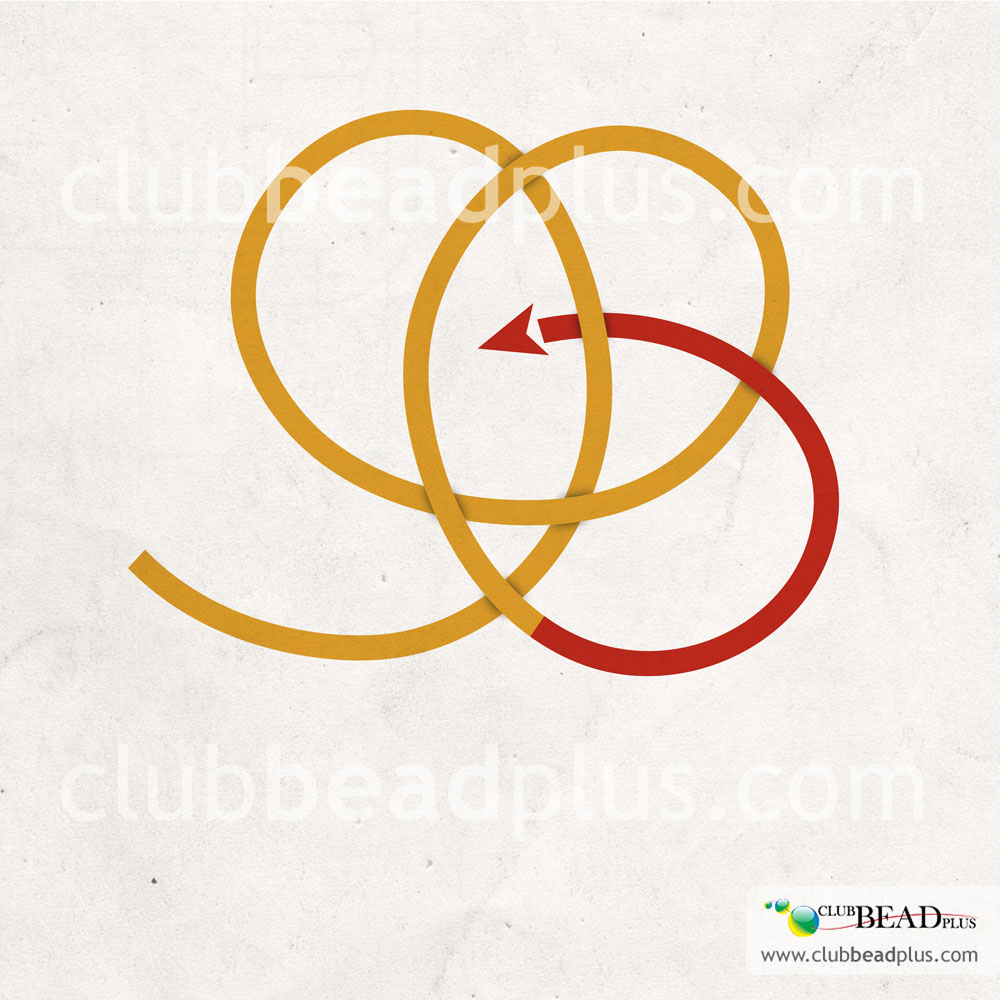
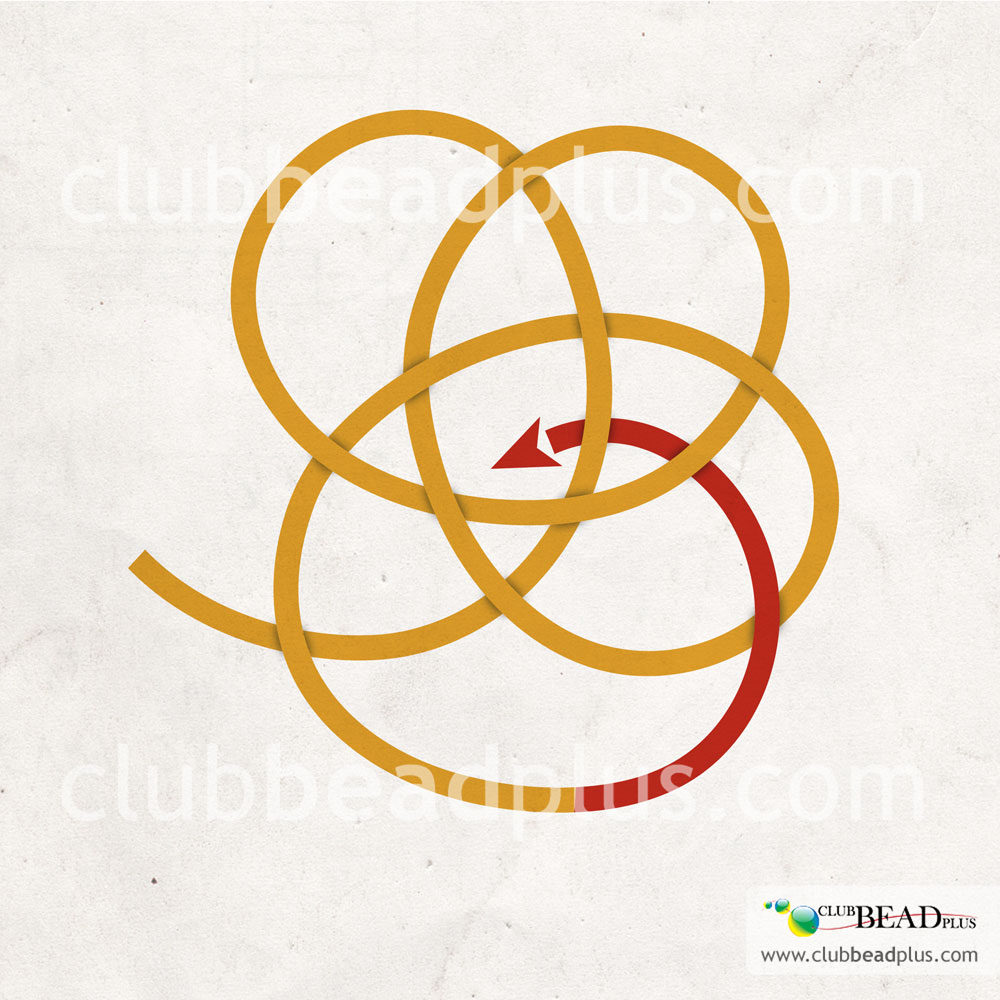

Making the knot

Step 2
If you are working with two different cords, tie them at about 6 cm from the extremities, on one side. Pin the knot on the working surface, as illustrated. This will be the starting point of your knot. If you are using only one cord, fold it in two to find the center and pin its center on the working area. This will be the starting point of the knot.

Step 3
Position the cord as illustrated by pinning it. It is important to work in a regular manner to obtain even knots. To help make the pattern, position the cord on the surface of 5 cm X 5 cm.

Warning :Please note that the size of the working surface varies depending on the size of the cord. The bigger the cord, the bigger the working surface. The bigger the working surface, the more cord you will need. The external loops of the cord will then be bigger as well.


Step 4
Thread the cord as shown, by making sure to pass through the loops already in place. If needed, use the tweezers to help thread the cord. Pay attention to the place where the cord has to pass (over or under) because it is essential to the success of the knot.

Step 5
Now take the other cord (or the other half) and thread it as illustrated.

Step 6
Thread the cord, as illustrated.

Step 7
Gently remove all the pins by making sure that the loops remain in their place. Gently pull on the 6 external loops as well as on the cords’ ends to tighten the knot. You can undo the initial knot that links the strings of different colors.

Note
To successfully make this knot, you must make sure that the external loops are of even size and the middle braiding even. If the external loops are uneven, remove any excess cord from the loops that are too big by threading them through the weaving, until you have totally eliminated any excess cord. Repeat the operation until you get even sized loops.