


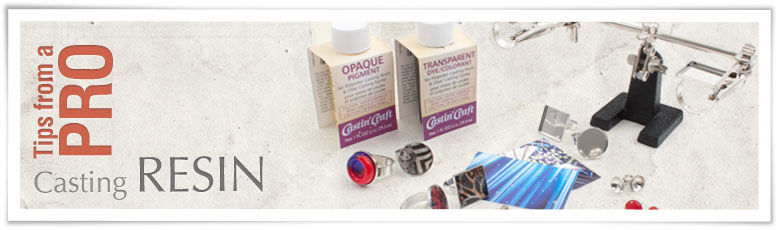
Tips from a Pro - Casting Resin
To discover our wide selection of bases for cabochons and for resin, click here!
One of our designers tested for you our casting resin. Discover her tips on how they can be used
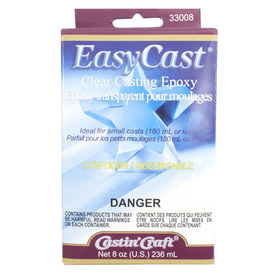
}The casting resin packaging always includes two bottles, one with resin and the other with a hardening agent.
Mandatory tools
- Wooden sticks to mix the resin and the hardener.
- Graduated beakers or plastic cups (disposable) to pour, measure and mix resin. You can also measure the amount of resin and hardener, using 2 different graduated syringes, or even a dropper or a disposable plastic pipette.
- A straw or a toothpick to eliminate bubbles.
- Gloves and safety glasses.
- Tweezers to drop and/or move small objects.
- A sheet or a plastic bag to protect the working surface.
Please note: since resin is very sticky and hard to clean, do not reuse beakers or wooden sticks. Furthermore, it can be handy to keep the excess resin to verify if it has set properly.
Preparation
To make resin, take your time; plan in advance what you are doing and the upcoming steps. It is important to know that it takes 12 to 48 hours for it to set. It is also important to plan an adequate working area where the resin can set without mishaps.
Setting (or curing) time:
- 12 hours for a malleable consistency
- 24 hour for a regular consistency
- 48 hours for a solid consistency
It is important to read carefully the instruction provided in the packaging as resin is a very capricious product and small details can prevent it from setting properly. This is why I recommend always testing it (12 to 48 hours) prior to pouring it on an important piece.
Resin must be warm to the touch (container) before starting any work with it.
Measure and mix
Be careful: Most of the time when a resin does not set or remains gluey, it is because of a bad resin/hardener ratio, or because it was not well mixed. These steps are the most important.
It is simple: One part resin for one part hardener. However, the recipe can be different depending on the type of resin you use. Always refer to the instruction manual.
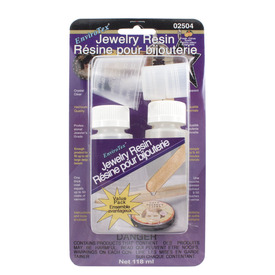
- Use the graduated beakers to measure. It is very important to be precise in this step. For more accuracy, put the pouring spouts on each of the bottles of the EnviroTex Resin for jewelry.
Warning: Be careful; do not switch the resin and hardener bottle caps. To help you differentiate them, a small “h” is written on the cap of the hardener’s bottle and the pouring spout’s cap is black like the writing on the bottle. To avoid making mistakes, open one bottle at a time, pour the desired amount then close the bottle before opening the second one. - Pour the resin and the hardener in the beaker, and then stir it using a wooden stick.
- Scrape the inside and the bottom of the beaker and the wooden sticks. It is important that everything in the small beaker be 100% homogenous.
- Stir it for 2 minutes (2 real minutes) while trying to avoid the formation of bubbles in the resin.
- Then, empty the mixture into the second beaker and stir for another minute with another wooden stick while scraping the inside and the bottom of the beaker and the wooden stick so the mixture is homogenous.
Adding dyes or pigments
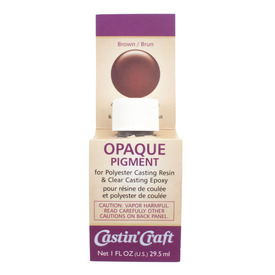
- To color resin, add a drop (or more, depending on the desired result) of colorant or pigment in the resin and hardener mixture.
- Before applying the resin to your project, make sure it is well mixed.
Application
You have approximately 25 minutes to work with the resin before it starts setting.
- Pour the resin in the mold or in the desired recipient.
- Bubbles will probably form. You can remove them with a toothpick or a straw, by blowing on the surface of the resin. Since the bubbles will come back to the surface they burst when one blows on the resin’s surface. This step has to be repeated on and on until satisfaction. and requires patience. On the other hand, it does make a huge difference! ;)
Warning: Sometimes, when blowing in a straw with too much vigor on the resin, it can overflow from its recipient and there can be small droplets of saliva that fall in the straw, in the resin. They will not blend with the resin and will show on the surface of the resin as little dots. Absorb them with the end of a Kleenex.
Adding objects

- If you wish to add objects in the resin (charms, beads, crystal chatons, etc.), first add a thin coat of resin, and eliminate any bubbles then add the selected objects.
- Pour resin on the objects.
Adding images

- If you wish to add an image in the resin, it is recommended to glue the image at the bottom of the recipient and apply a coat of liquid glue (transparent when dry) with a paintbrush (disposable) on the image to seal the paper.
- Let the first coat dry completely then apply a second coating of glue. When everything has dried, pour the resin on the image and eliminate any bubble.
I tested it with a cutout from a magazine without applying paper sealing glue and it worked well however, a more porous paper would most probably have soaked the resin, which can give the impression that the paper is wet. Do your own tests!
Using molds
Resin mold plates, allow for molds of a variety of different shapes.
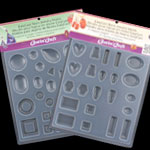
- Put the plate flat down and pour the resin mixture in the mold.
- Wait until the resin has taken (24 hour) before removing the piece otherwise; it might lose its shape.
It is strongly suggested on the moldings plates packaging to apply a spray on the mold before pouring resin on it to facilitate the removal of the piece from the mold. Don’t be impatient!
Making molds
Silicone masticallows you to make a mold from objects in your surroundings (charms, pendants, coins, seashells, twigs etc.). Silicone mastic is actually a two-part dough that needs to be mixed in equal parts and that harden when mixed together. The dough then takes on a flexible rubbery texture, perfect to make resin molds. Carefully read the instructions on the packaging before using it.
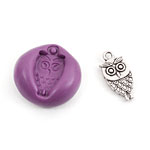
- Make a small ball with each paste to see if their sizes are even. Adjust them in consequence.
- When you obtain two balls of equal sizes, mix them together to make a homogenous dough.
- Make a ball that can be flattened slightly on the working surface (from this point on, you have 3 minutes to make the mold)
- Press the object you wish to mold in the dough until it overflows on the sides of the object (or as desired) and leave it there.
- Let it rest for 25 minutes then remove the object. The mold is ready! It’s as simple as that!
Other useful information
- Resin can tarnish (becomes yellowish) with time or when exposed to light.
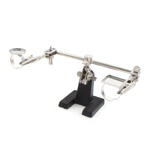
- The stand with 2 clips is a very useful tool, it is necessary to maintain an object in a specific position when it can not remain flat, and one needs to pour resin in it.
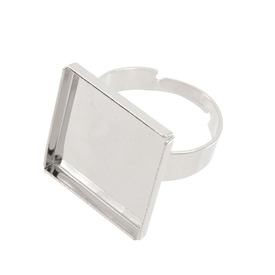
Molded shapes can be glued on the following finding accessories:
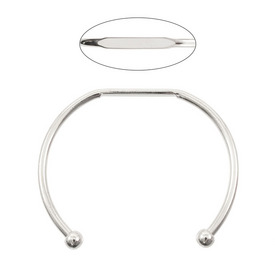
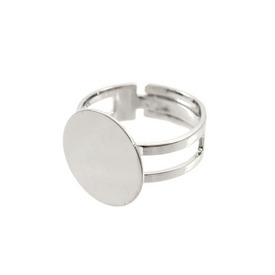
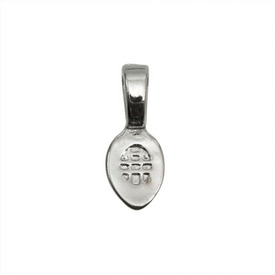
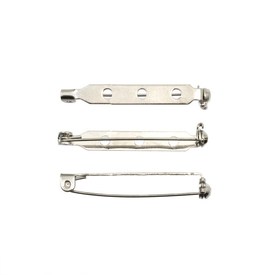
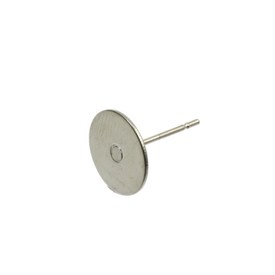
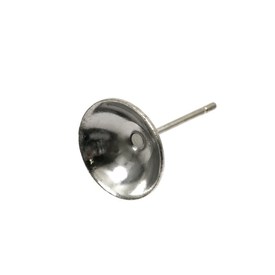
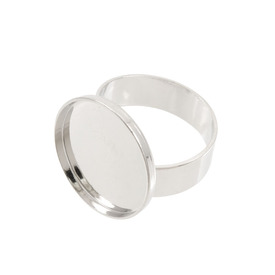
Resin can be poured directly in the following findings accessories:
*Be careful: The sides must be folded inward with large flat-headed pliers to avoid letting some of the resin get into crevices. Since resin has a thick consistency it does not get into small cracks! :)
For all our resin products, click here.
Share your attempts and success on our Facebook page !