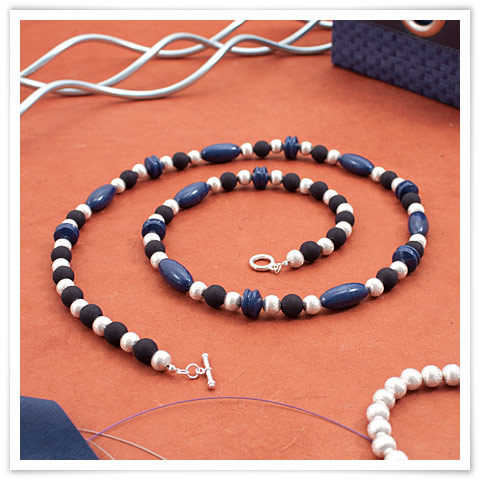
Project - Imani
Long necklace made with handmade polymer clay beads, metal beads and plastic beads strung on nylon covered steel string.
Material
- +/- ¾ of a package of Fimo Effect polymer clay, metallic sapphire blue
- 40, 10 mm round brushed metal beads, silver
- 26 round plastic beads of 12 mm, black
- +/- 1 m of nylon covered stainless steel string 0.018, natural
- 2, 2 mm round crimp beads, silver
- 2, 4x10 mm knot covers with loops, silver
- 1, 15 mm toggle clasp, silver
- 2, 6 mm jump rings, silver
Tools
- 2 flat nose pliers
- Stove (to bake)
- Protective gloves
- Polymer clay slicer
- Fimo bead roller
- Cutter pliers
- Cooking plate
- Fimo glossy varnish
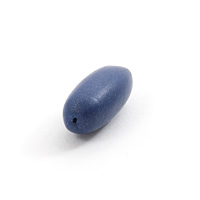
Making oval polymer clay beads
Step 1
Put a pair of protective gloves to avoid marking the beads with your fingerprints and staining your hands.
Step 2
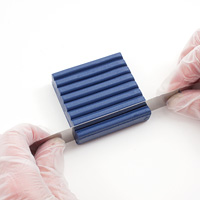
Using a polymer clay blade cut about a stick of the polymer clay block, as illustrated.
Step 3
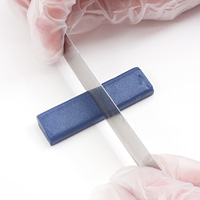
Then separate the stick in two equal parts using the blade. That is the polymer clay amount needed to make an oval bead.
Step 4
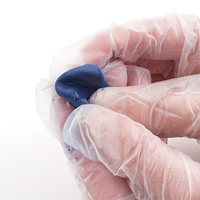
Knead the polymer clay with your hand for a couple of minutes to soften it.
Step 5
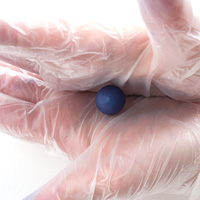
When the dough is soft enough, shape it into a ball by rolling it between the palms of your hands.
Step 6
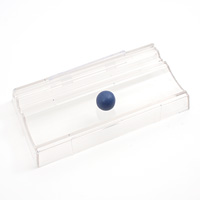
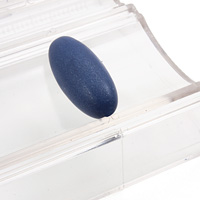
Put one of the two sections of the bead roller on a working area. Then, place the dough ball in the middle groove that corresponds to the oval bead.
Step 7
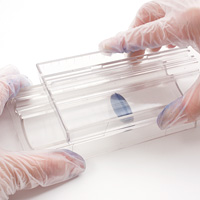
Put the second section of the bead rolle on the first in order for both parts to interlock. With one hand, keep the section of the machine that is on the working area. Using your other hand, make back and forth movements with the top section until the bead is well formed and has a regular shape.
Step 8
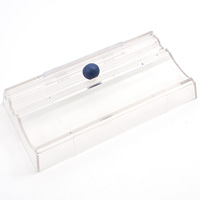
Position the center of the bead so it is aligned to one of holes that allows for a needle. This gap eases the piercing of the bead’s hole. It guides the needle while the two plastic sections maintain the bead in place and prevents it from being misshapen.
Step 9
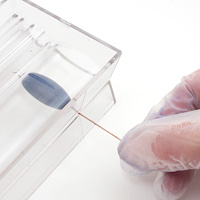
Straightly insert the needle to pierce the bead on its full length, then remove it.
Step 10
Put the bead aside on a stove plate and repeat steps 2 to 9 to make the other 6 oval beads.
Making freestyle shaped polymer clay beads
Step 11
To make freestyle shaped beads, repeat steps 1 to 5 but this time, separate the polymer clay stick in 4 even parts. Use only one of the stick’s quarters to make a freestyle shape bead.
Step 12
Place the dough ball in the middle groove that corresponds to the freestyle shaped bead and repeat steps 7 to 9 to shape and pierce the bead.
Step 13
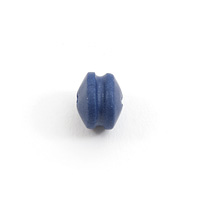
Put aside the bead on a stove plate and repeat steps 11 and 12 to make the other 7 freestyle shaped beads.
Polymer clay baking and final steps
Step 14
When all the beads are made, bake them for about 25 minutes at 230˚F or as per the specific instructions of the polymer clay being used.
Let the beads cool completely before manipulating them.
Let the beads cool completely before manipulating them.
Step 15
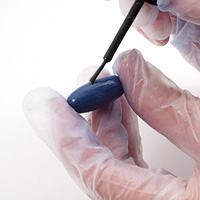
Coat the beads with varnish using a painting brush included in the Fimo glossy varnish. Let the varnished beads dry for about 20 minutes before manipulating them.
Stringing beads on nylon covered steel string
Step 16
Measure and cut a little over 1 m of nylon covered steel string.
Step 17

Insert one of the two extremities of the string in a knot cover then in a crimp bead.
Step 18

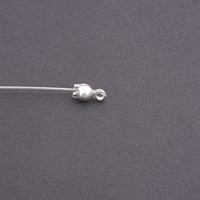
Using flat nose pliers crush the crimp bead at the end of the string and close the knot cover on the crimp bead.
Step 19
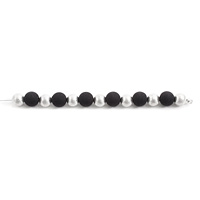
String by alternating, 7 beads of brushed metal of 10mm and 6 plastic beads of 12 mm as illustrated.
Step 20
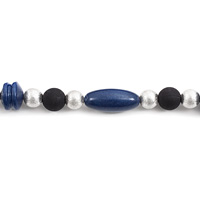
String 3 times, successively, the illustrated sequence of beads by starting with the polymer clay freestyle bead.
You will obtain a total of 3 freestyle shaped polymer clay beads, 3 polymer clay oval beads positioned in alternation. Between each polymer clay beads, 2 beads of brushed metal of 10 mm and 1 bead of plastic of 12 mm must be strung.
You will obtain a total of 3 freestyle shaped polymer clay beads, 3 polymer clay oval beads positioned in alternation. Between each polymer clay beads, 2 beads of brushed metal of 10 mm and 1 bead of plastic of 12 mm must be strung.
Step 21
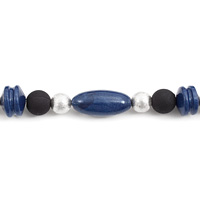
For the middle section, insert the following sequence: 1 freestyle shaped polymer clay bead, 1 plastic bead of 12 mm, 1 bead of brushed metal bead of 10 mm, 1 brushed metal bead of 10mm, 1 oval polymer clay bead, 1 brushed metal bead of 10 mm, 1 plastic bead of 12 mm and 1 freestyle shaped polymer clay bead.
Step 22
Repeat step 19, in the opposite direction this time, to symmetrically make the other side of the necklace.
Step 23
Repeat step 18 to complete the necklace. Make sure that the beads are strung symmetrically.
Step 24
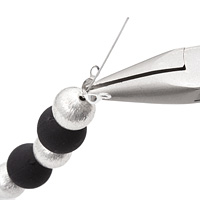
Insert the string in a knot cover then string a crimp bead. Position the knot cover near the last brushed metal bead then crush the bead inside the knot cover as illustrated. Cut the excess string then close the knot cover on the crimp bead.
Finishing the necklace
Step 25
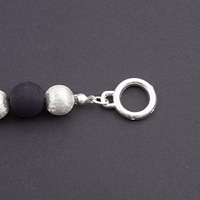
Fold the loop of the clasp to the knot cover using a jump ring of 6 mm as illustrated.
Step 26

Do the same to link the clasp’s pin to the knot cover.
Inspiration & Variation
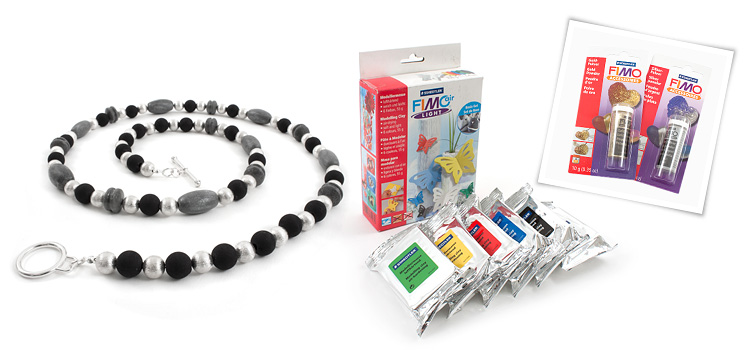
Handmade beads can also be made from polymer clay that air-dries (Fimo Air). Indeed, this clay can also be used with the bead roller and it hardens when in contact with air. You can even get the metallic effect by applying a coat of silver metallic powder.