Impress Art Instructions

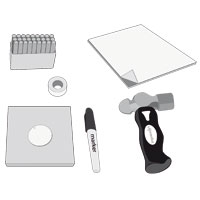
Tools Needed:
- Metal Stamps
- Metal Stamping Hammer
- Steel Stamping Block
- Metal Disc or Charm
- Permanent Marker
- Polishing cloth (or a paper towel or clean rag)
- Stamp Straight Tap
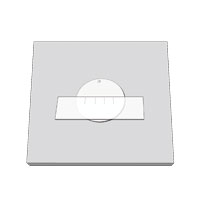
Step 1 :
Place your metal disc or work piece on a steel stamping block. To help stamp evenly and in a straight line, apply a strip Stamp Straight Tape along your work piece to create a guide. The top edge of the Stamp Straight Tape will help keep all your stamps level. To make sure your stamp impressions will be evenly spaced, mark the tape with a pen where each letter will be stamped.
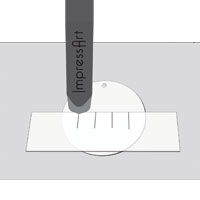
Step 2 :
Place your stamp on the disc. Lightly drag the stamp towards the corresponding line on the tape until you feel the bottom of the stamp catch the top edge of the Stamp Straight Tape.
Note: Be careful not to scratch the disc while dragging the stamp.

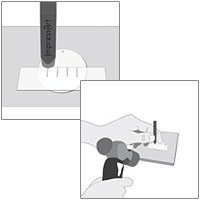
Step 3 :
Hold your stamp so that the head of the stamp is flush with the metal disc. Now, with medium pressure strike the top of the stamp. If you’ve hit the stamp too lightly you can strike it again as long as the stamp has not been moved.
Note: We recommend testing new stamps out on scrap metal. Stamps with more detail require a harder strike than stamps with less detail.
Step 4 :
Repeat steps 3 and 4 until all of your impressions are made. Remove the Stamp Straight Tape guide when you’ve finished stamping.

Step 5 :
To make your message pop, use a permanent marker to color in the impressions. Without letting the colored impressions sit too long, use a paper towel, or polishing cloth for best results, to wipe off any excess ink from the disc.

Result :
The ink from the marker will sit in the bottom of the impression making it stand out from the polished jewelry.